
Mojo's blog banner

Category: Photography and Video

  • Observing report, dark desert June skies

    Old Town Sidewalk Astronomers
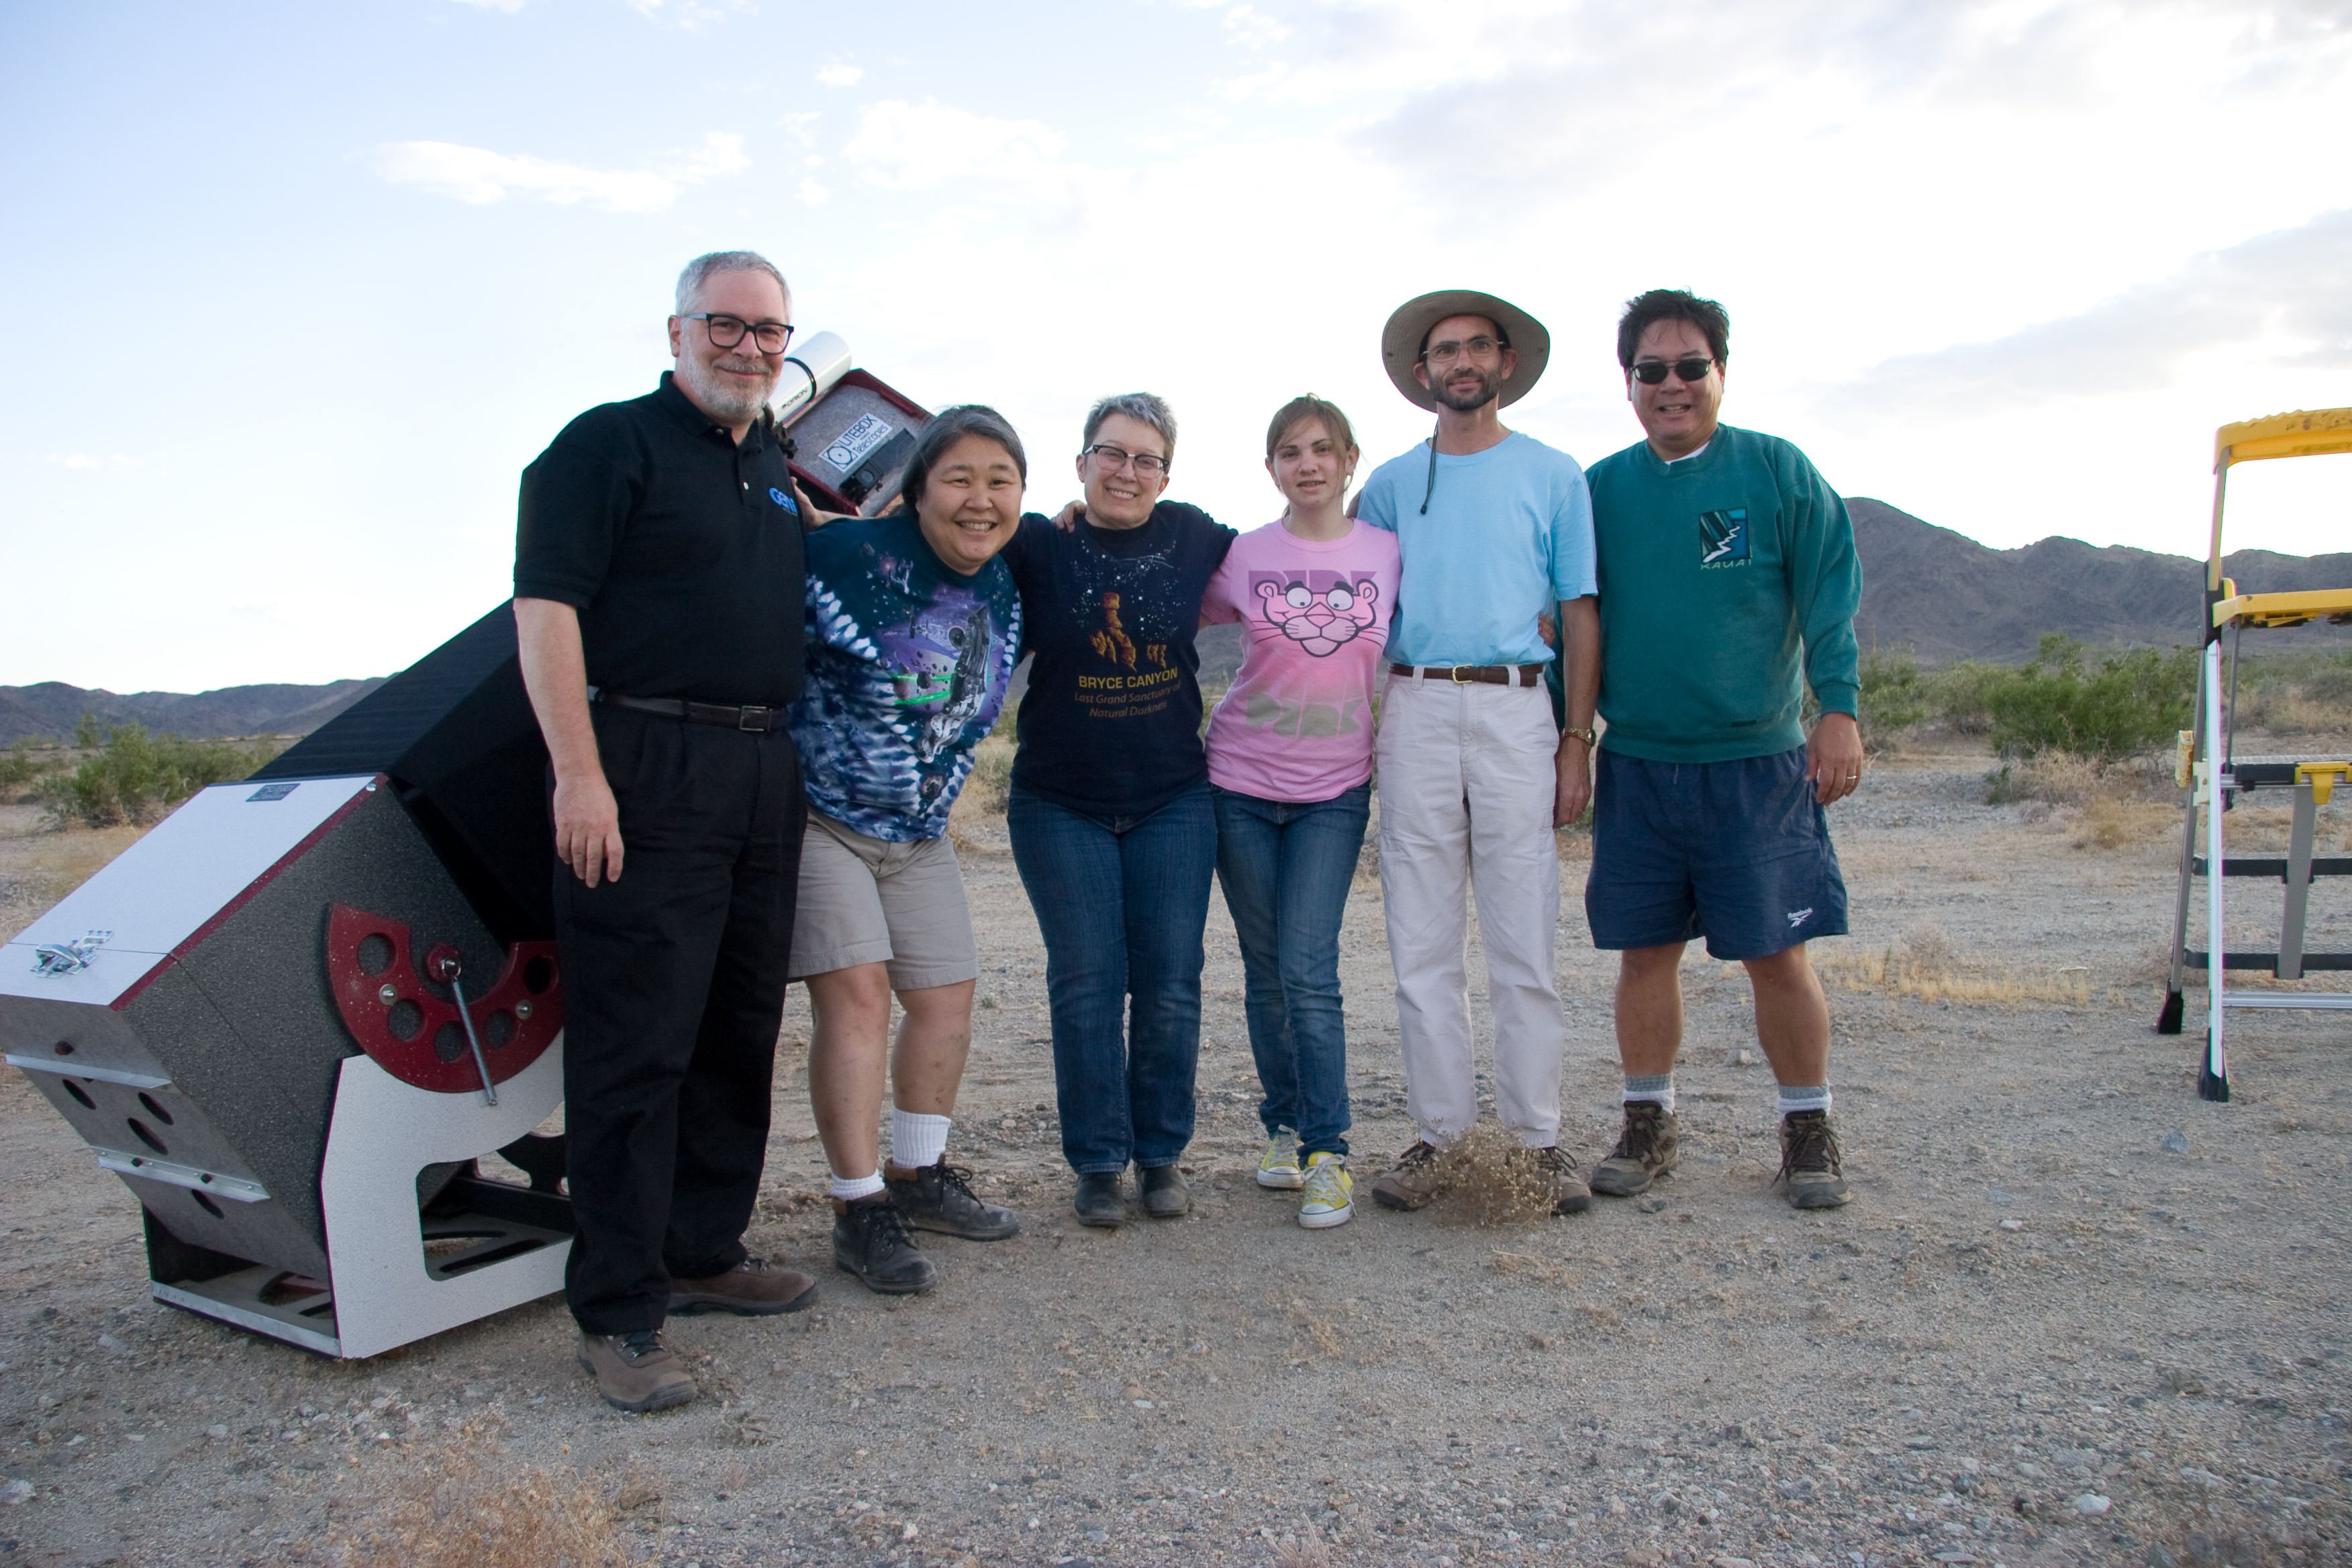
    Mojo, Caroline, Jane, Catherine, Gary, and Todd

    Update: Jane wound up using most of my astrophotos below in her July NASA What’s Up podcast. Check it out!

    The forecast was for a very temperate desert evening, so six of the Old Town Sidewalk Astronomers headed off to the Colorado Desert to play outside all night. Seeing was forecast poor, but actual conditions seemed much better.

    Jane packed her 17.5-inch dob, and I loaded the Astro-Physics Traveler 102mm f/6 refractor to do some astrophotography. The highlight of the evening promised to be comet McNaught 2009R1, but it wouldn’t be available until the pre-dawn hours. That left me with late spring galaxies and summer Milky Way targets. (Jane also had a great target which she’ll be writing about!)

    I tried the M84-M86 region of Virgo last month with the AP180, but the field of view was too narrow. I knew it’d be a good warm-up for tonight. The grey scale version looks better to me than the color rendition.
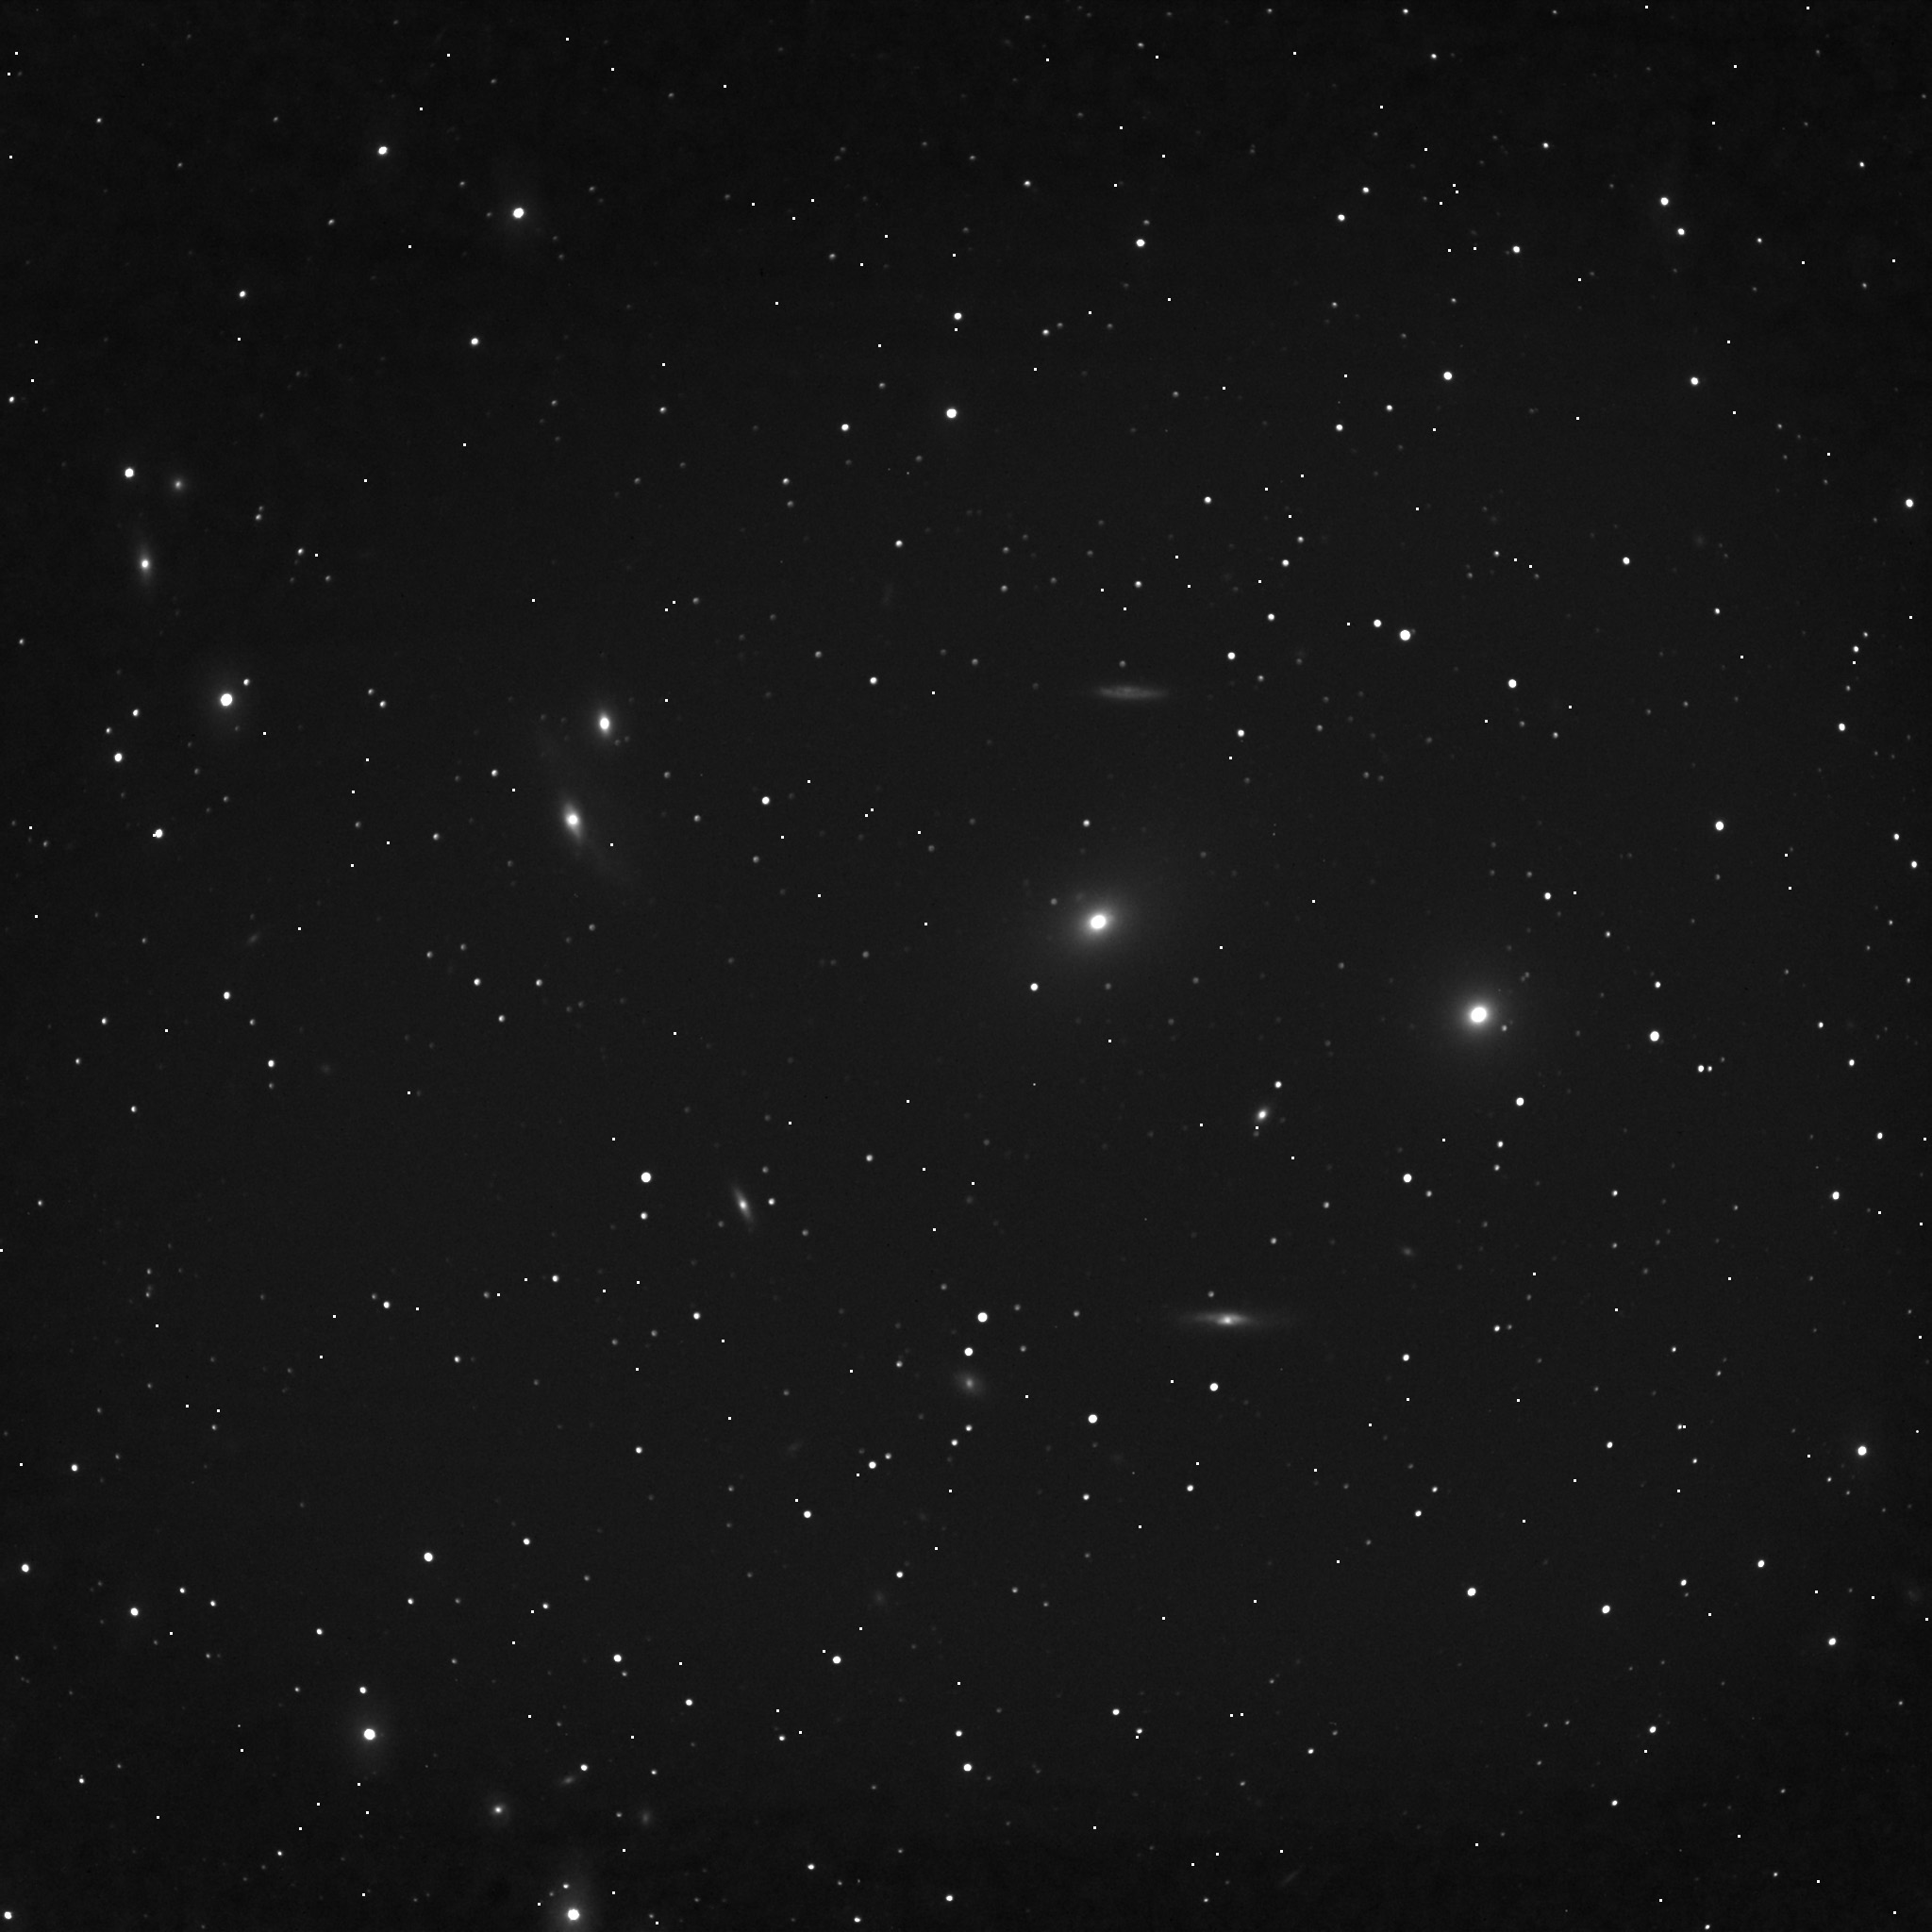
    M84-M86 region in Virgo, "the Nine Gals"

    Jane and I both love piggyback pictures, taken at “naked eye” scale. This is one of “the teapot” and the Sagittarius Milky Way. The full-size image isn’t bad, but it looks better scaled back a bit. Click for the really big version. It’s fun looking through all the dark nebulae and bright clusters.
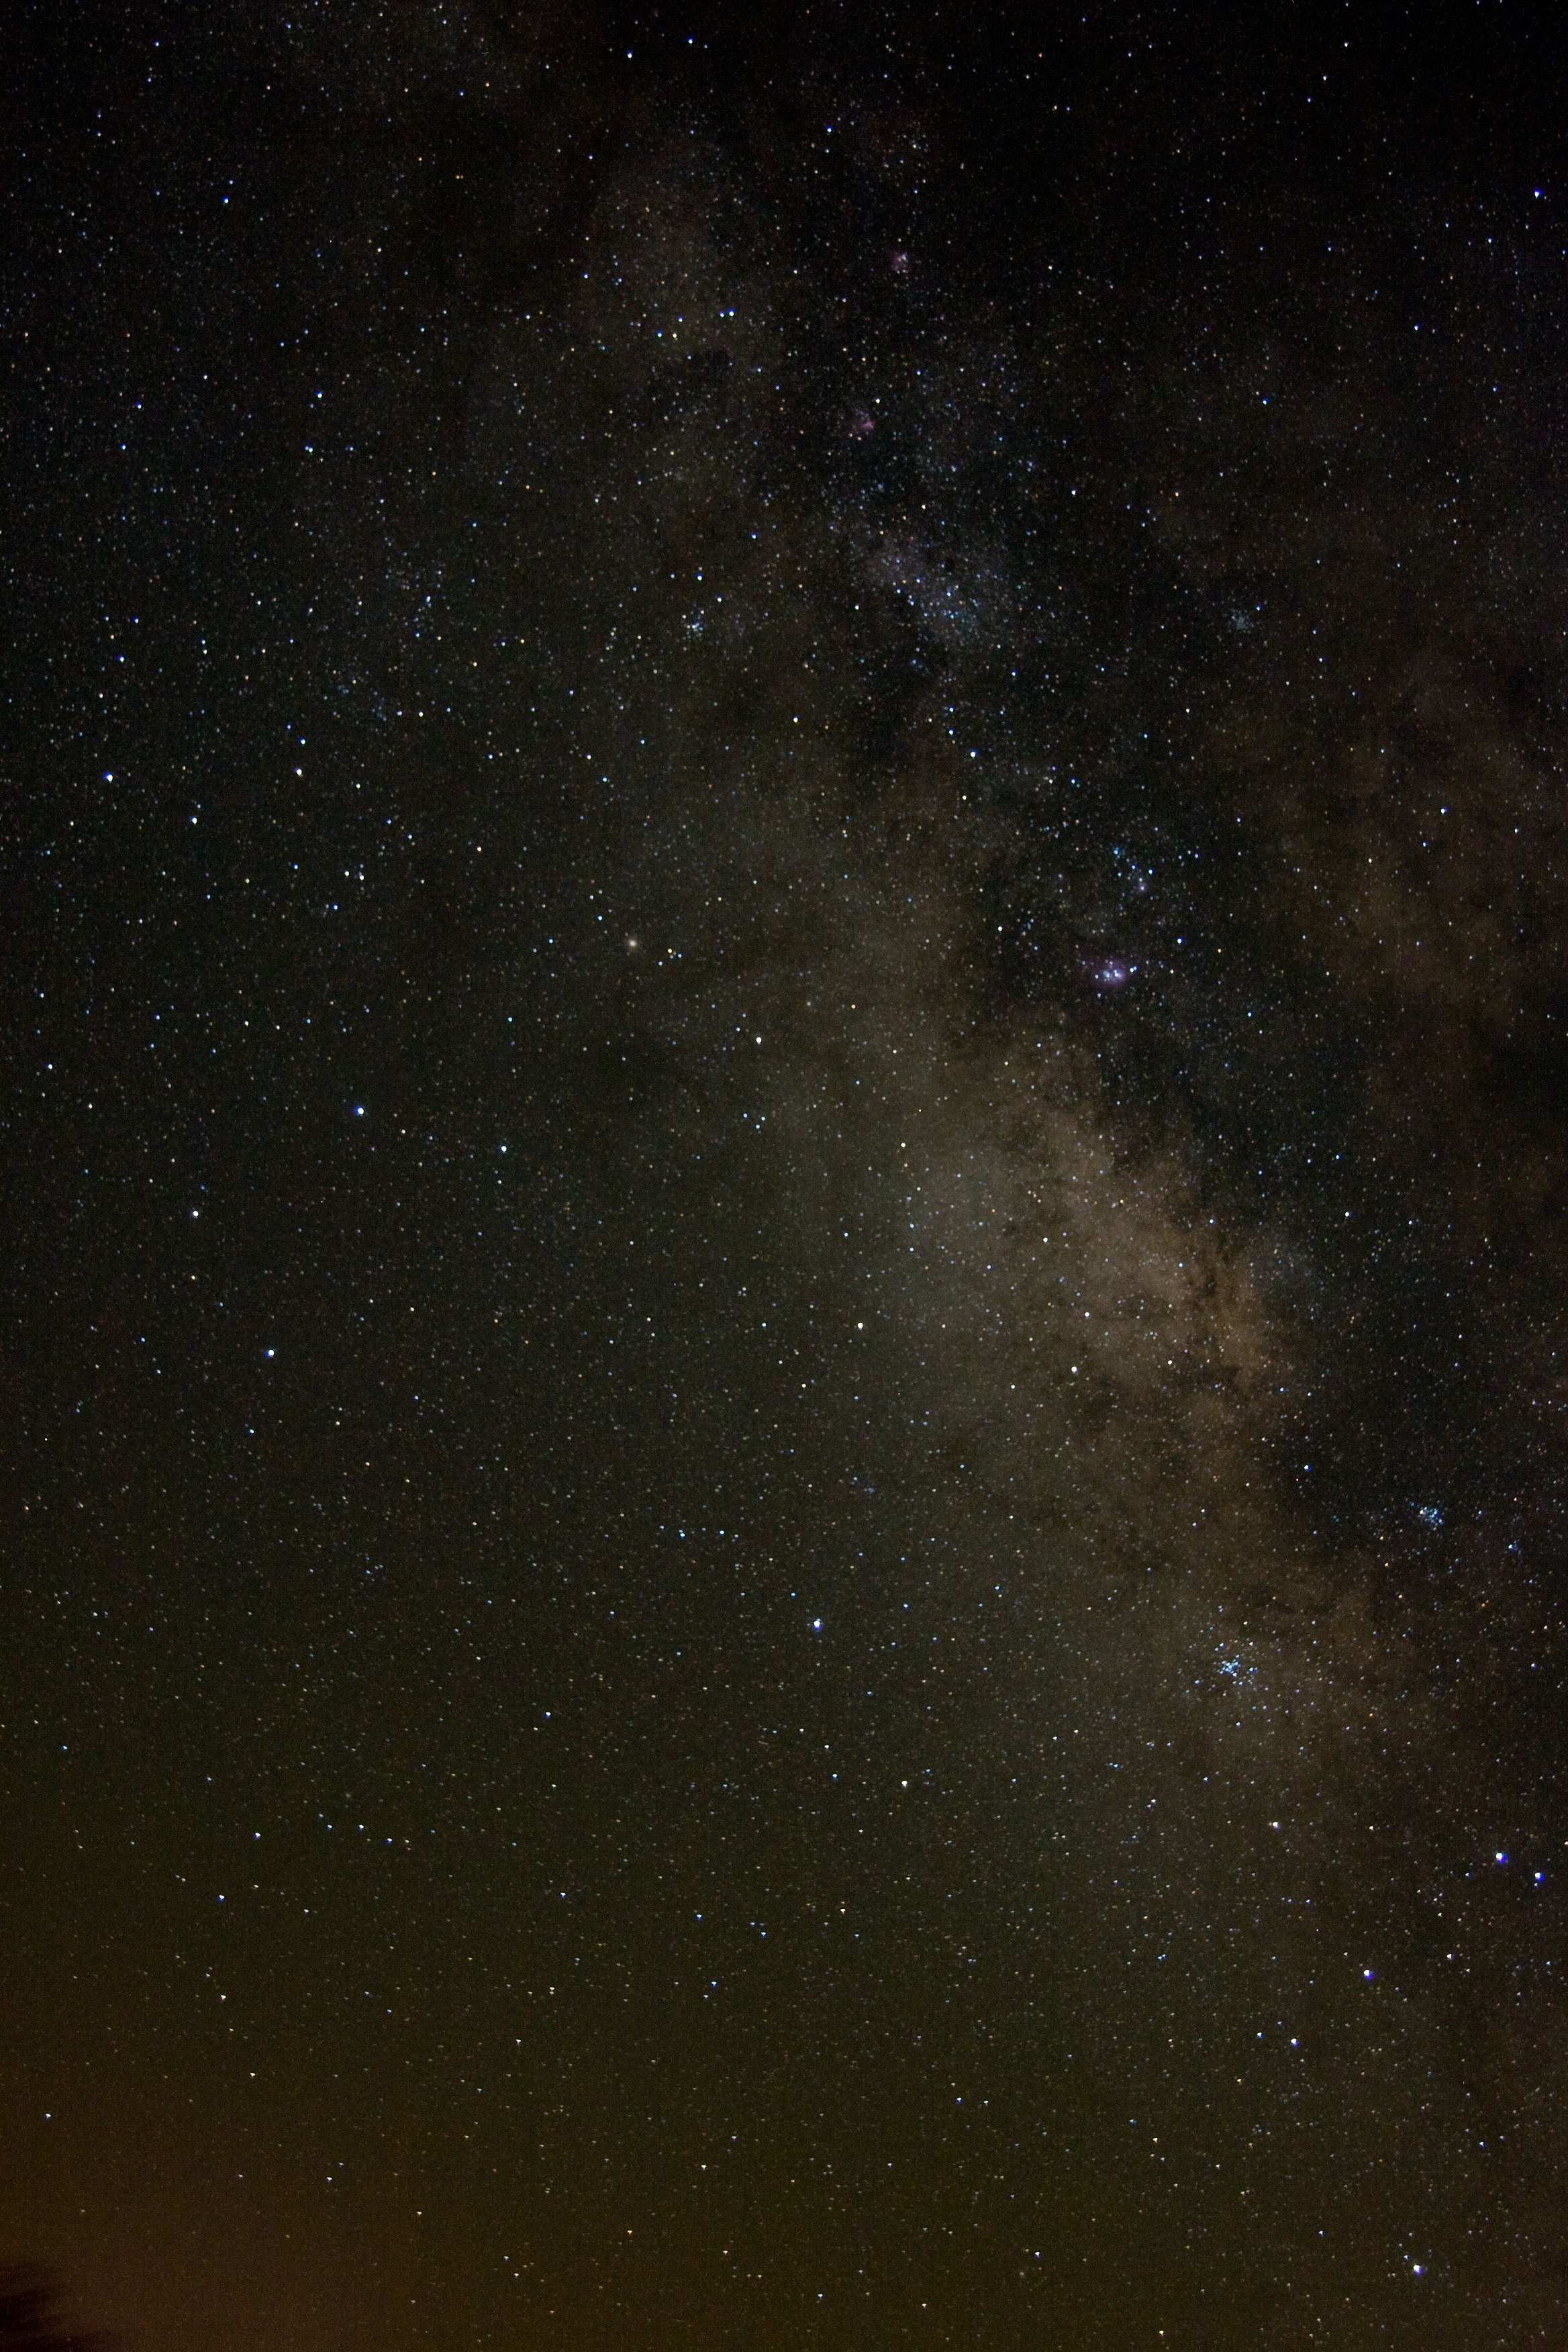
    Sagittarius Milky Way
    Looking towards the center of our galaxy.

    Deep in the Milky Way just above the spout of the teapot is Barnard’s famous “Ink Spot” dark nebula, B86.
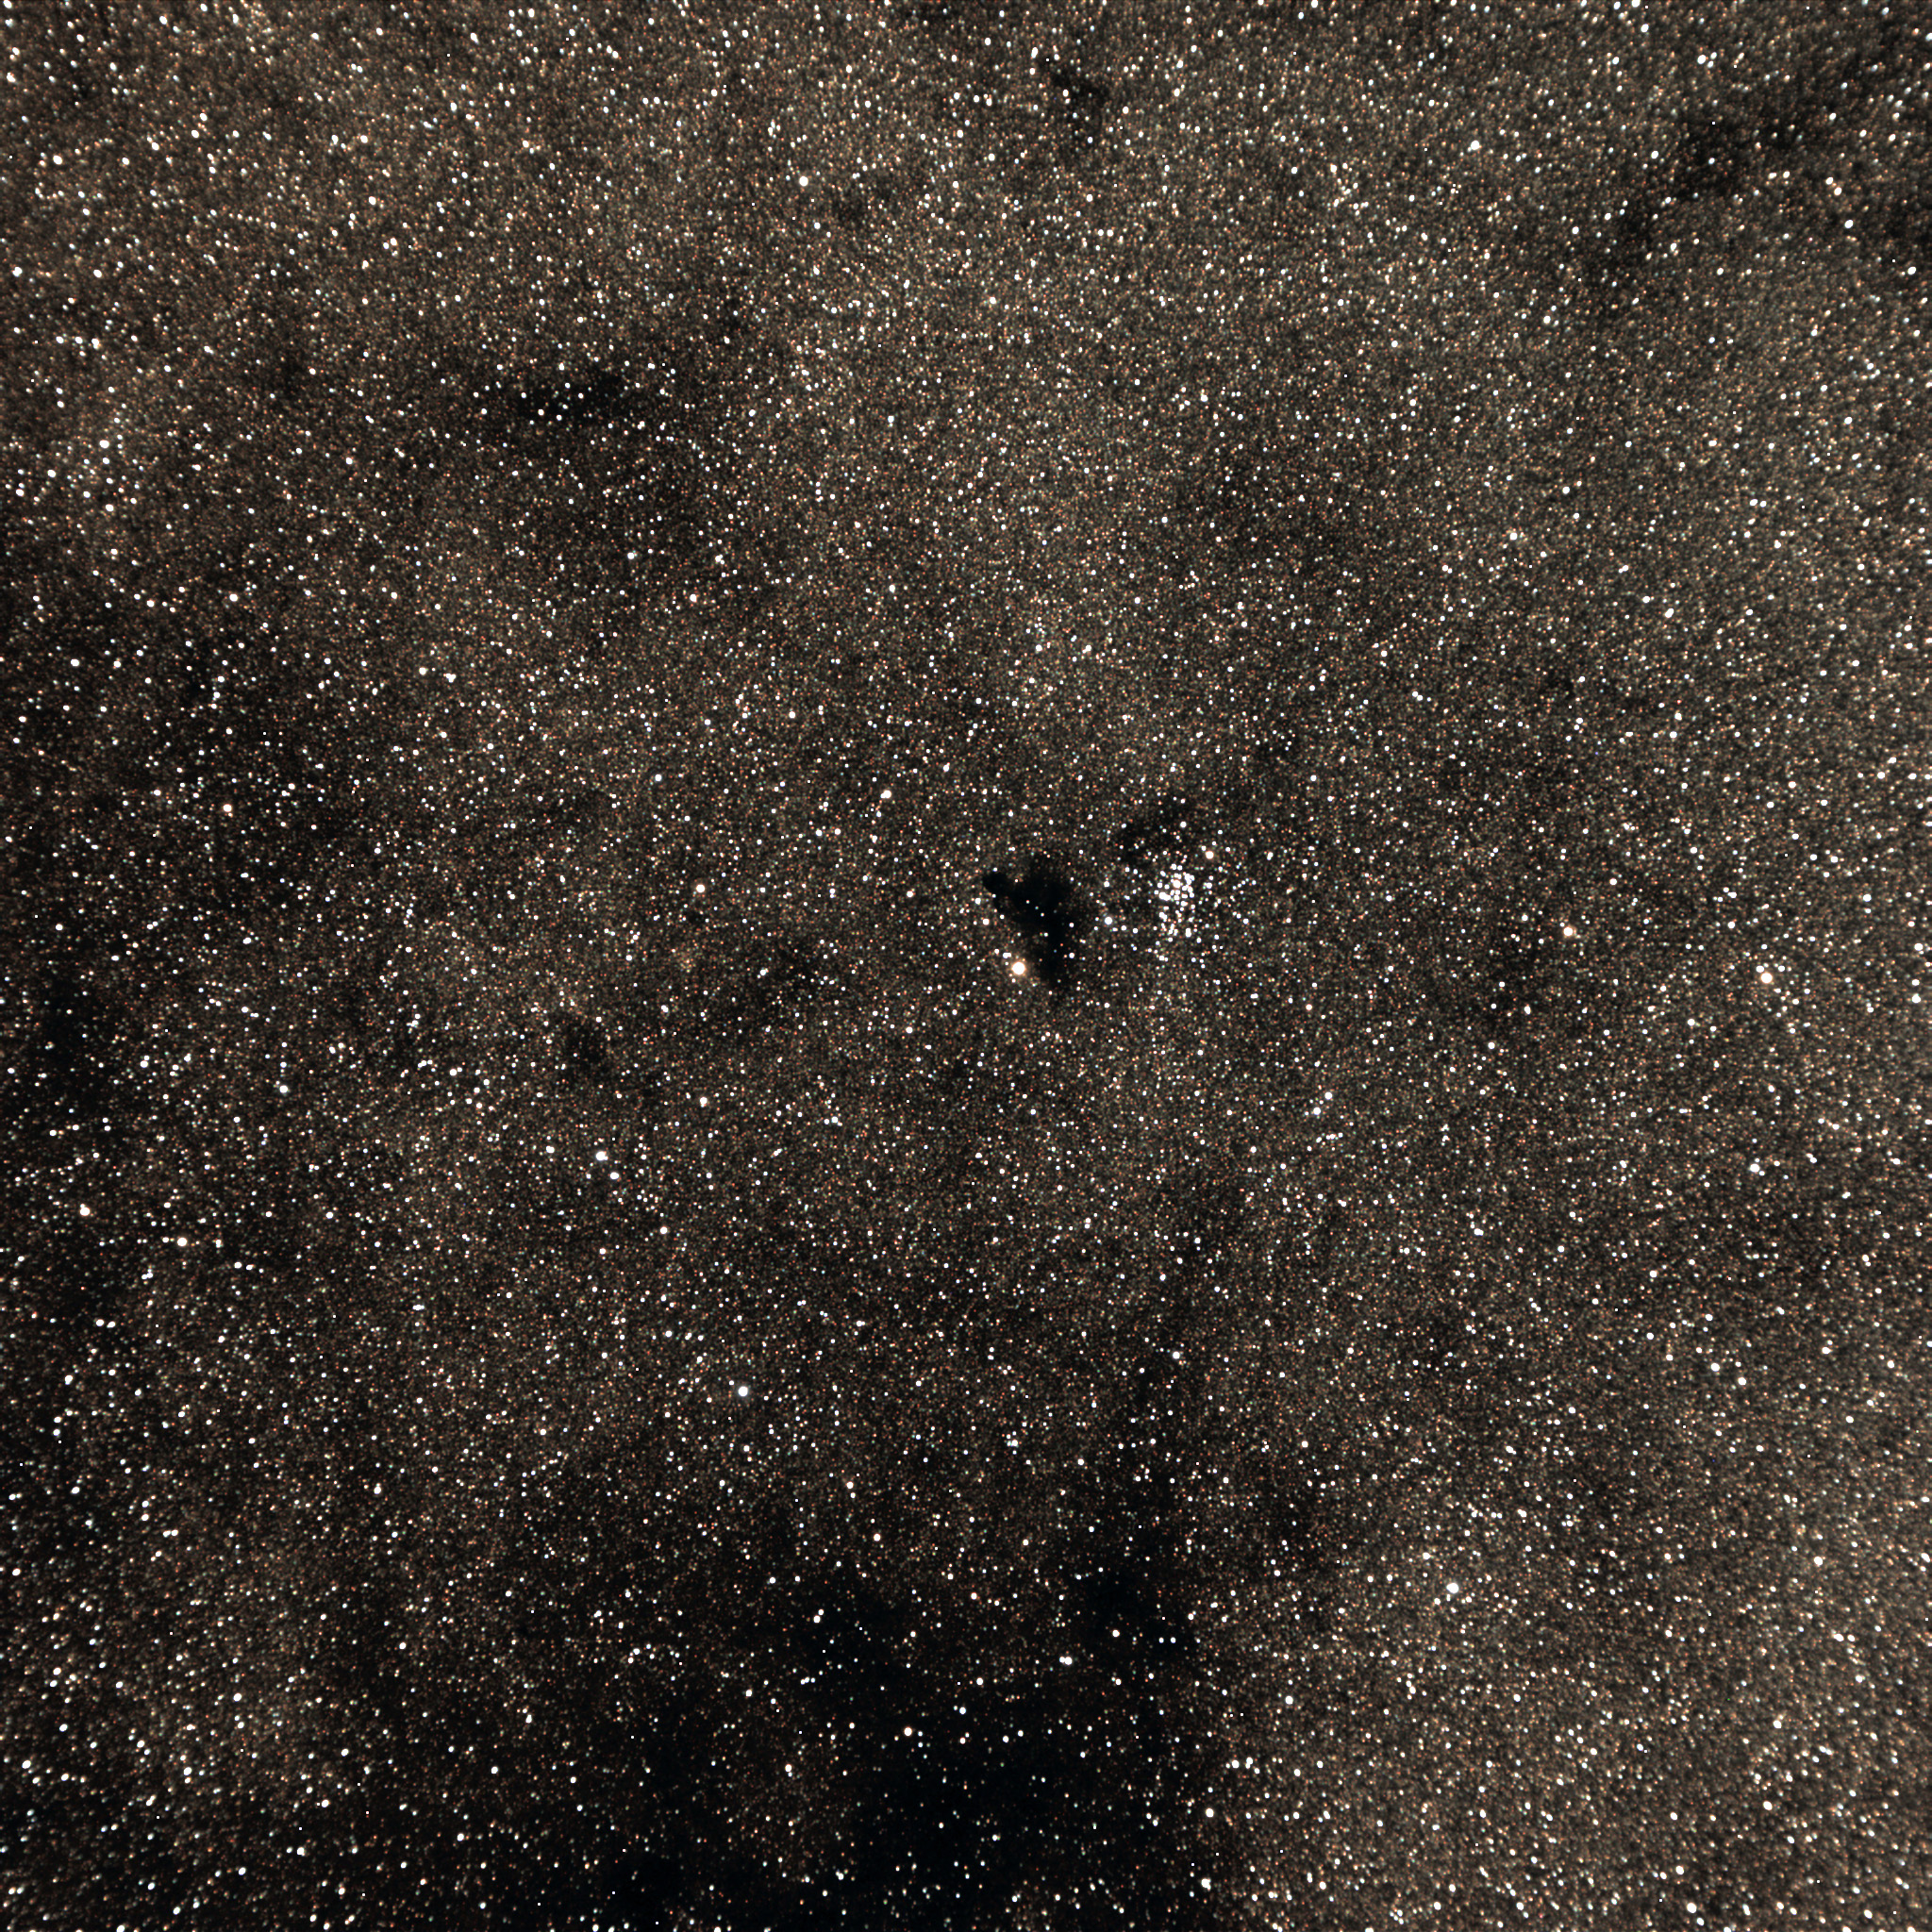
    Barnard 86 "The Ink Spot"

    I started out trying to fit M8 “The Lagoon Nebula” in the same field as the nearby Trifid Nebula, but they wouldn’t quite fit. So I did 15 minutes just on M8, and love the result.
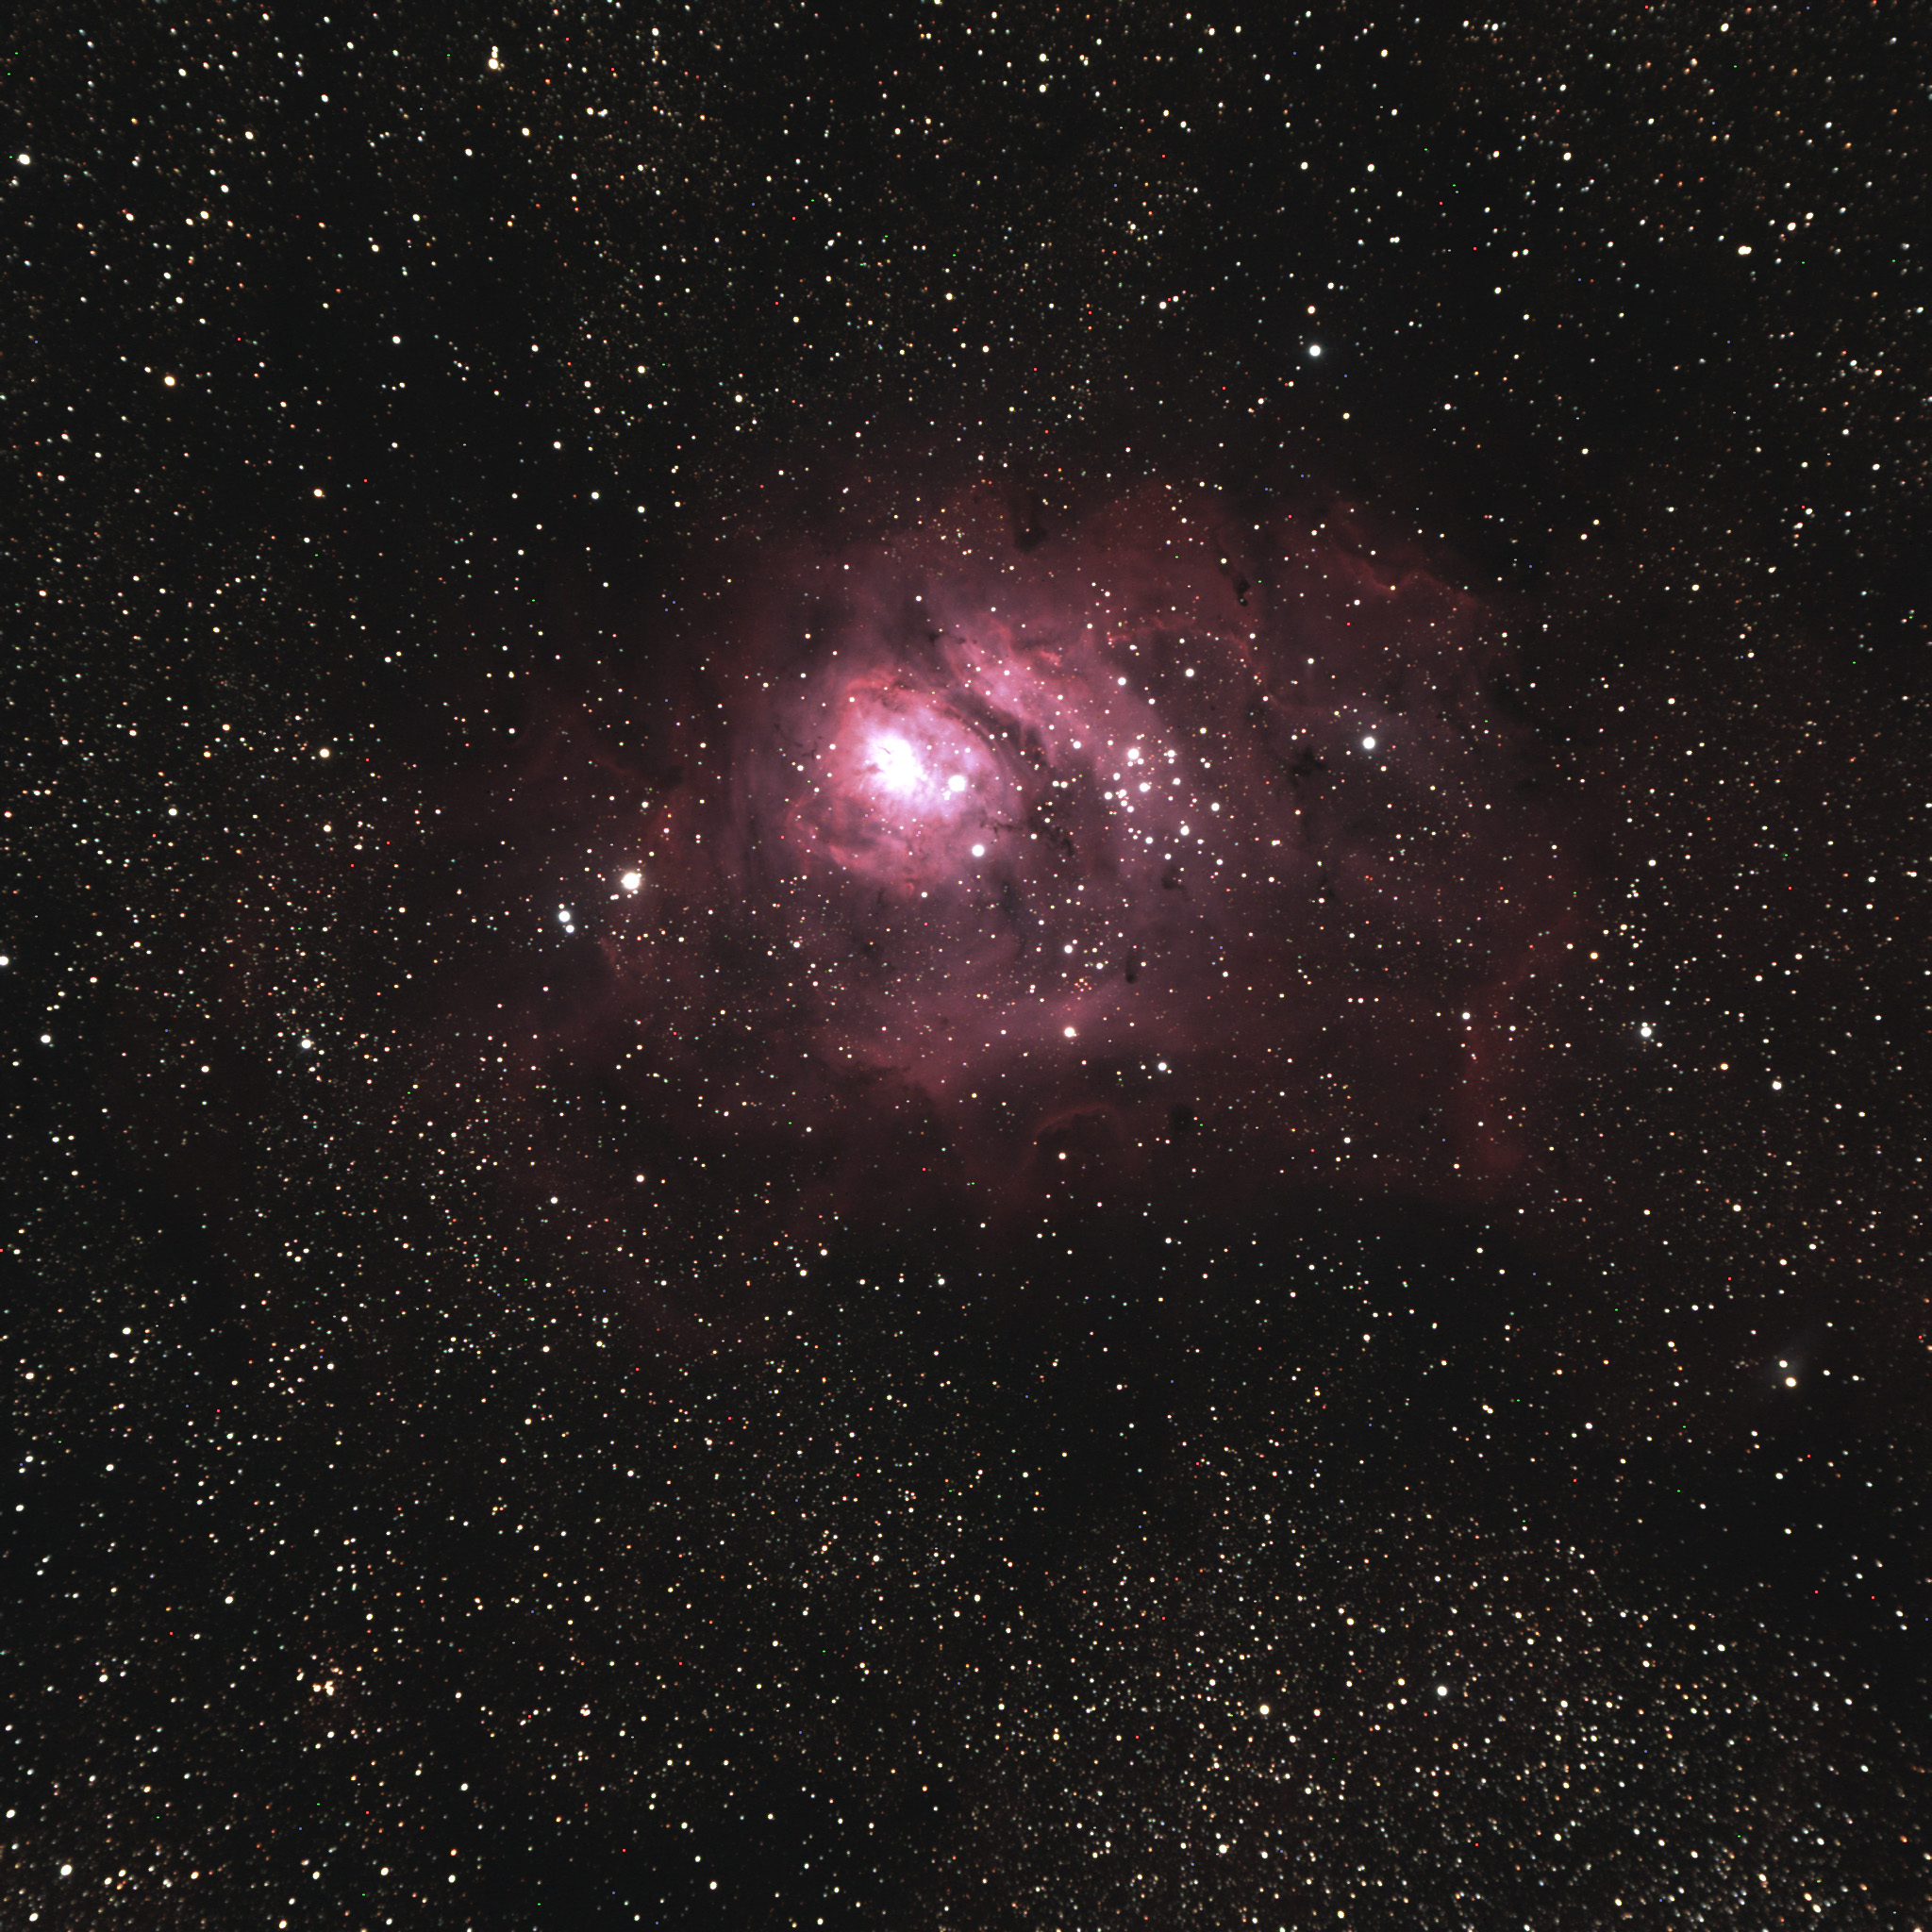
    M8 The Lagoon Nebula
    M8 The Lagoon Nebula and cluster

    I love hunting for the Pipe Nebula, a huge dark nebula best seen in binoculars. Seeing the Pipe is a portent of great transparency and dark skies. The detail photo here is centered on the Pipe, taken piggyback with the 20D. Click for the full field, see if you can find the Pipe there.
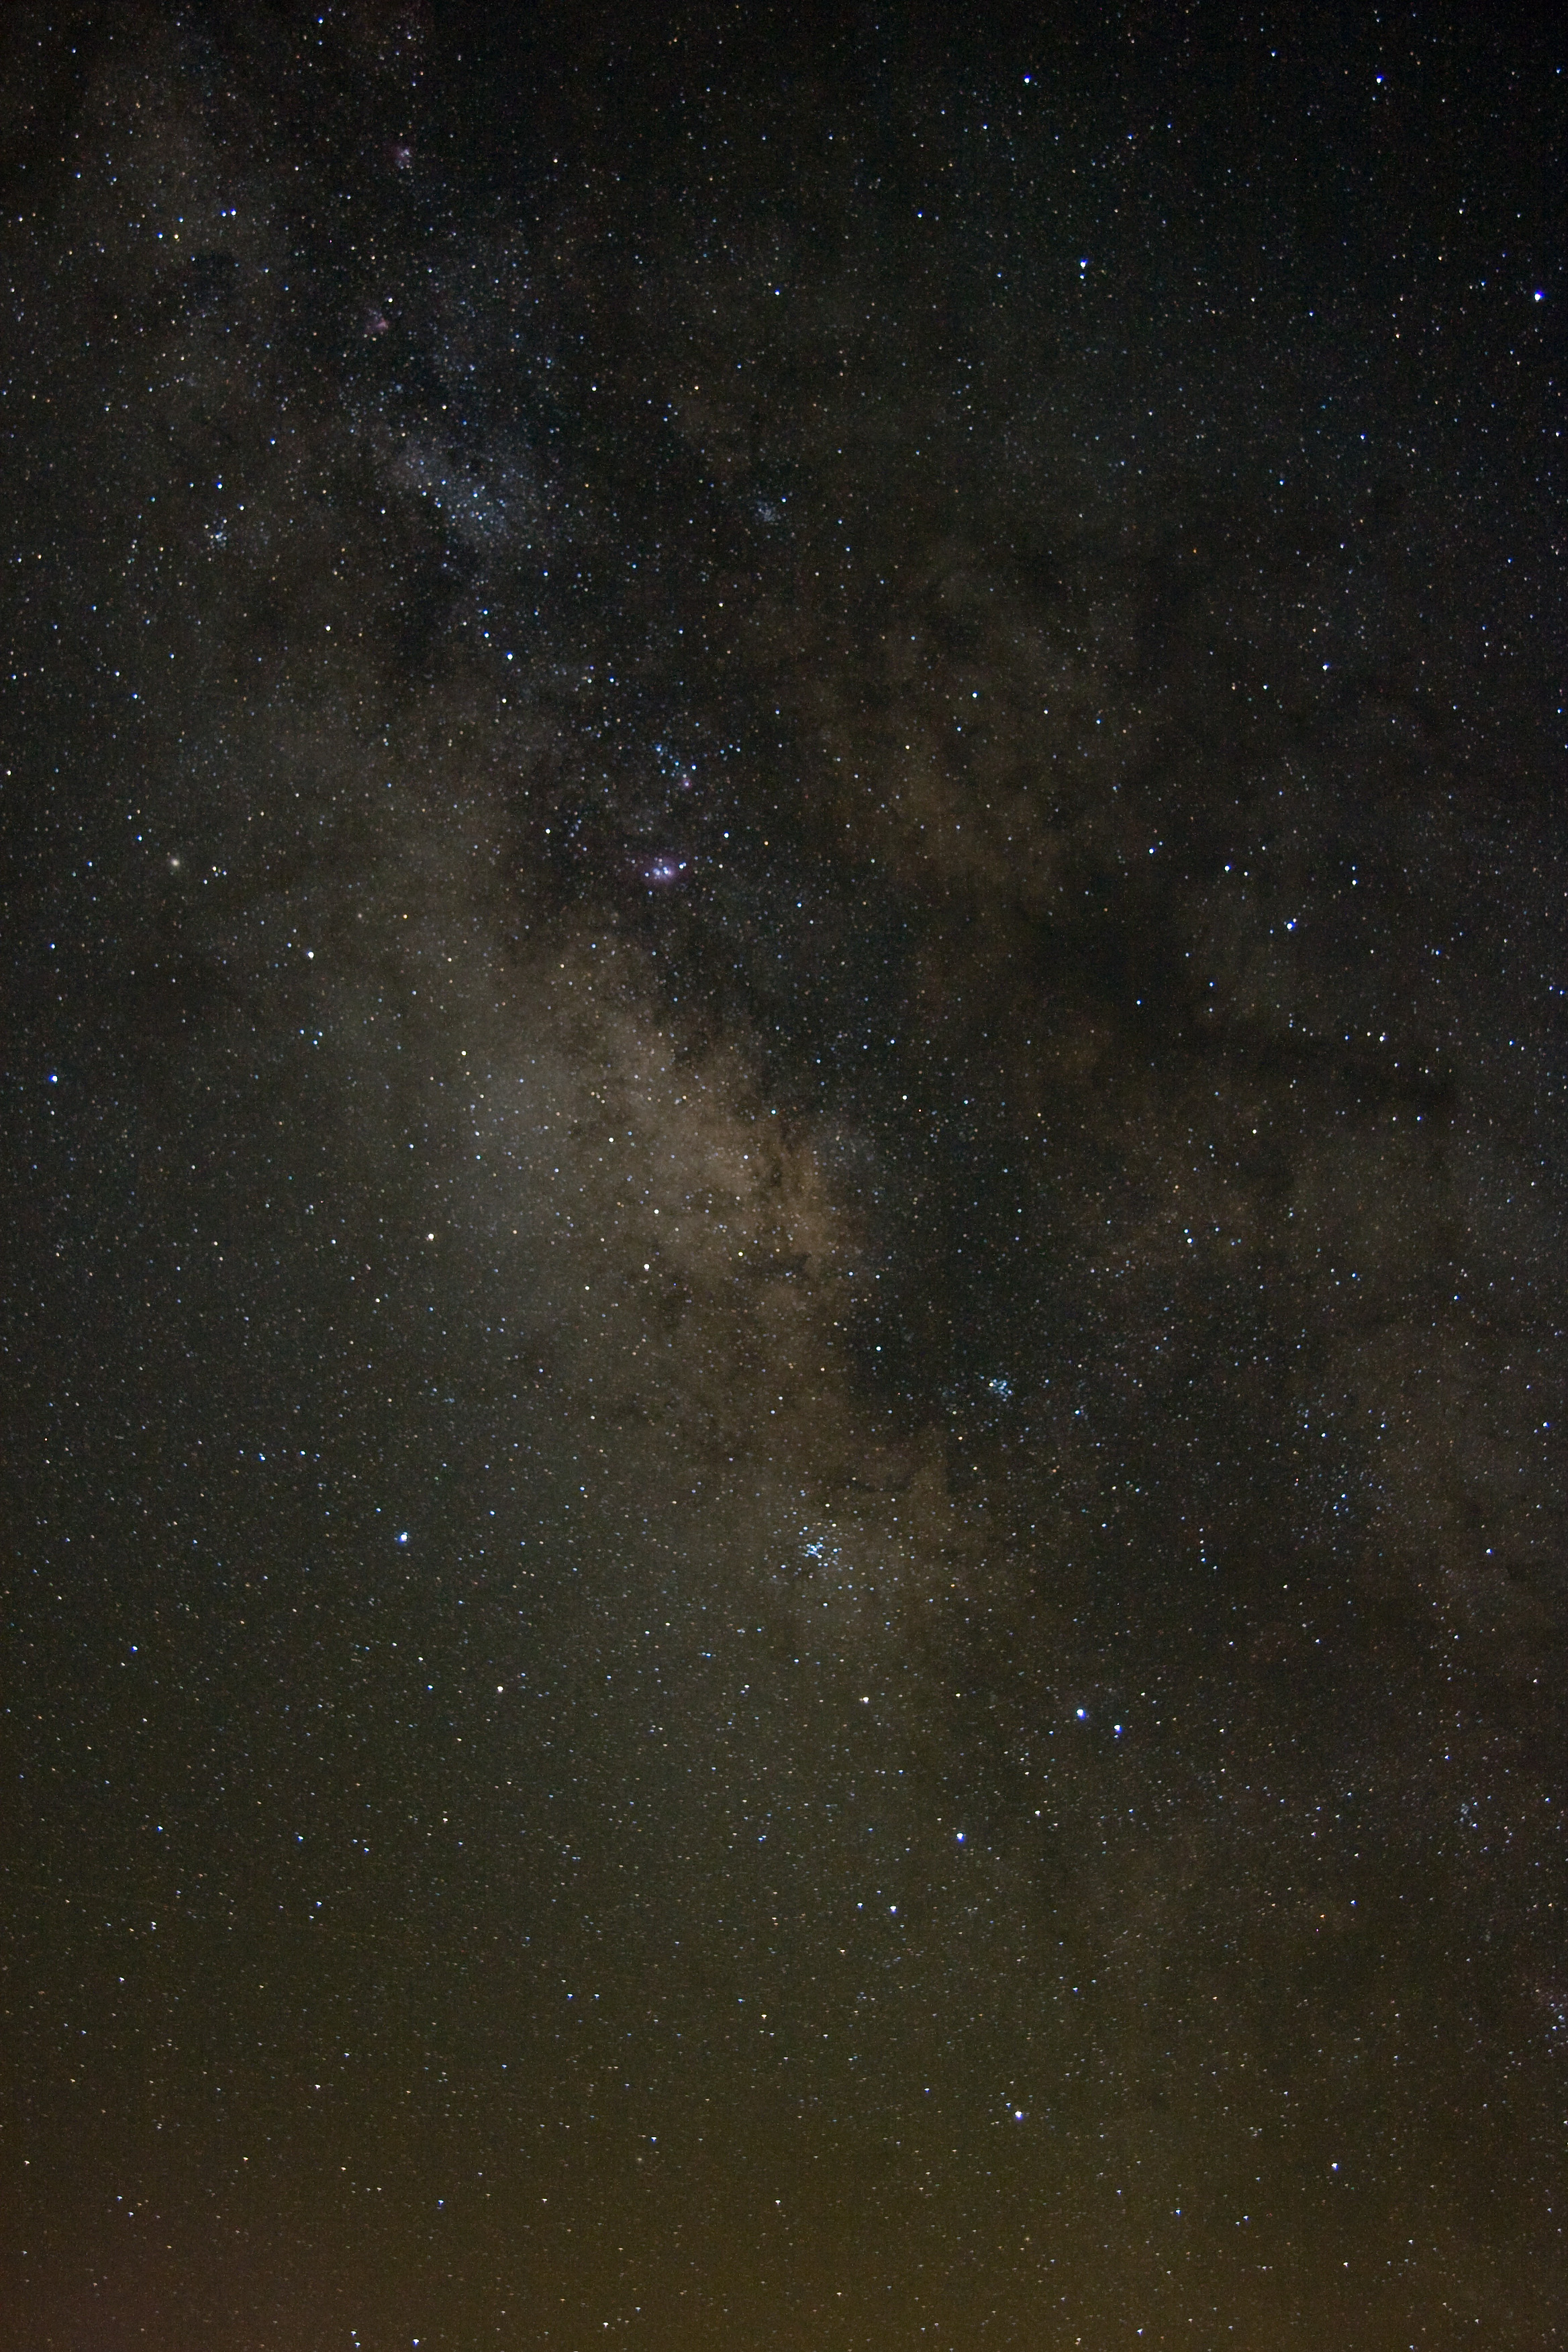
    Pipe Nebula detail
    Do you see the pipe outlined here? Click for the full field.

    Ever since I started doing astrophotography, I’ve been waiting for the opportunity to shoot M16 The Eagle Nebula. This nebula is famous for its Hubble Space Telescope image showing the embedded dark nebulae as stellar nurseries, the “Pillars of Creation.”

    I only did one fifteen minute exposure. By then it was getting quite late, and I need to catch a couple hours of sleep before getting up to catch comet McNaught. Naturally that means I had an airplane fly through the image! Should I wipe it out with Photoshop? Naaaah.
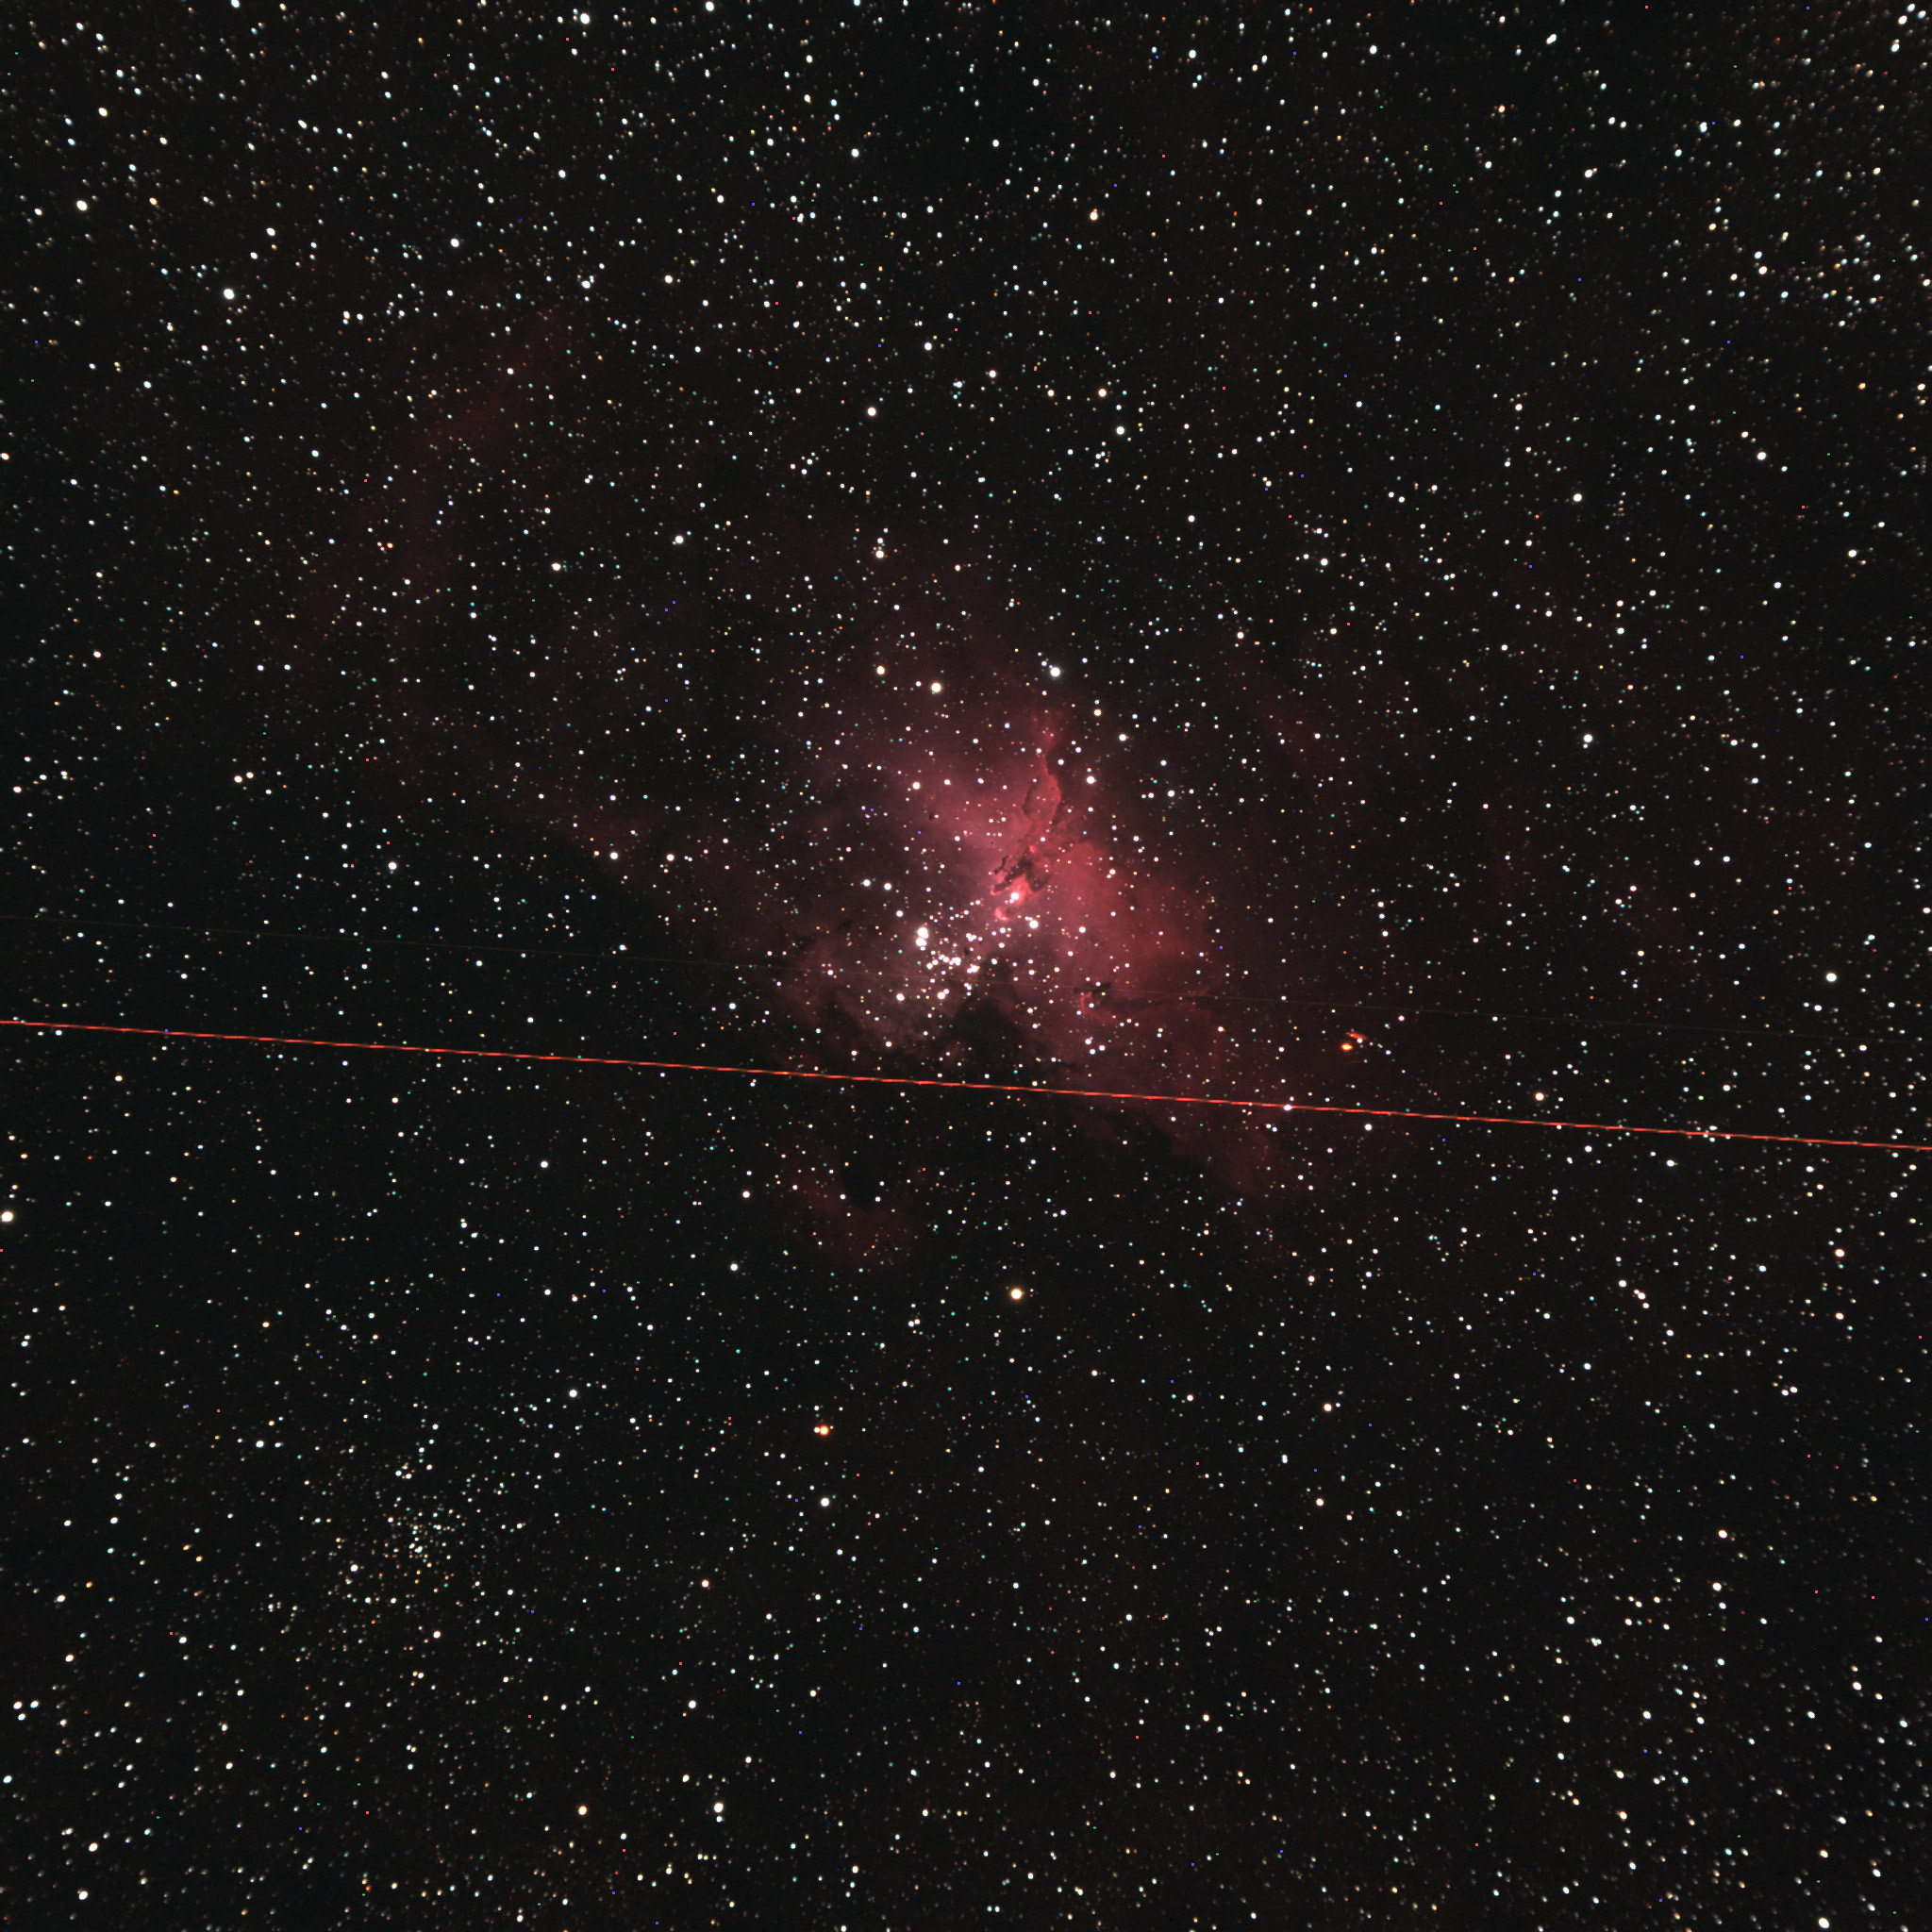
    M16 The Eagle Nebula
    M16 The Eagle Nebula and cluster. Plus United flight 2037. (Just kidding!)

    Jane and I napped for a couple of hours, with alarms set to catch comet McNaught in the early hours

    This image of McNaught is made from ten one-minute exposures. They’re stacked with the comet centered, so the background stars are streaked. It looks out of focus, but it’s actually just the motion of the comet you see.
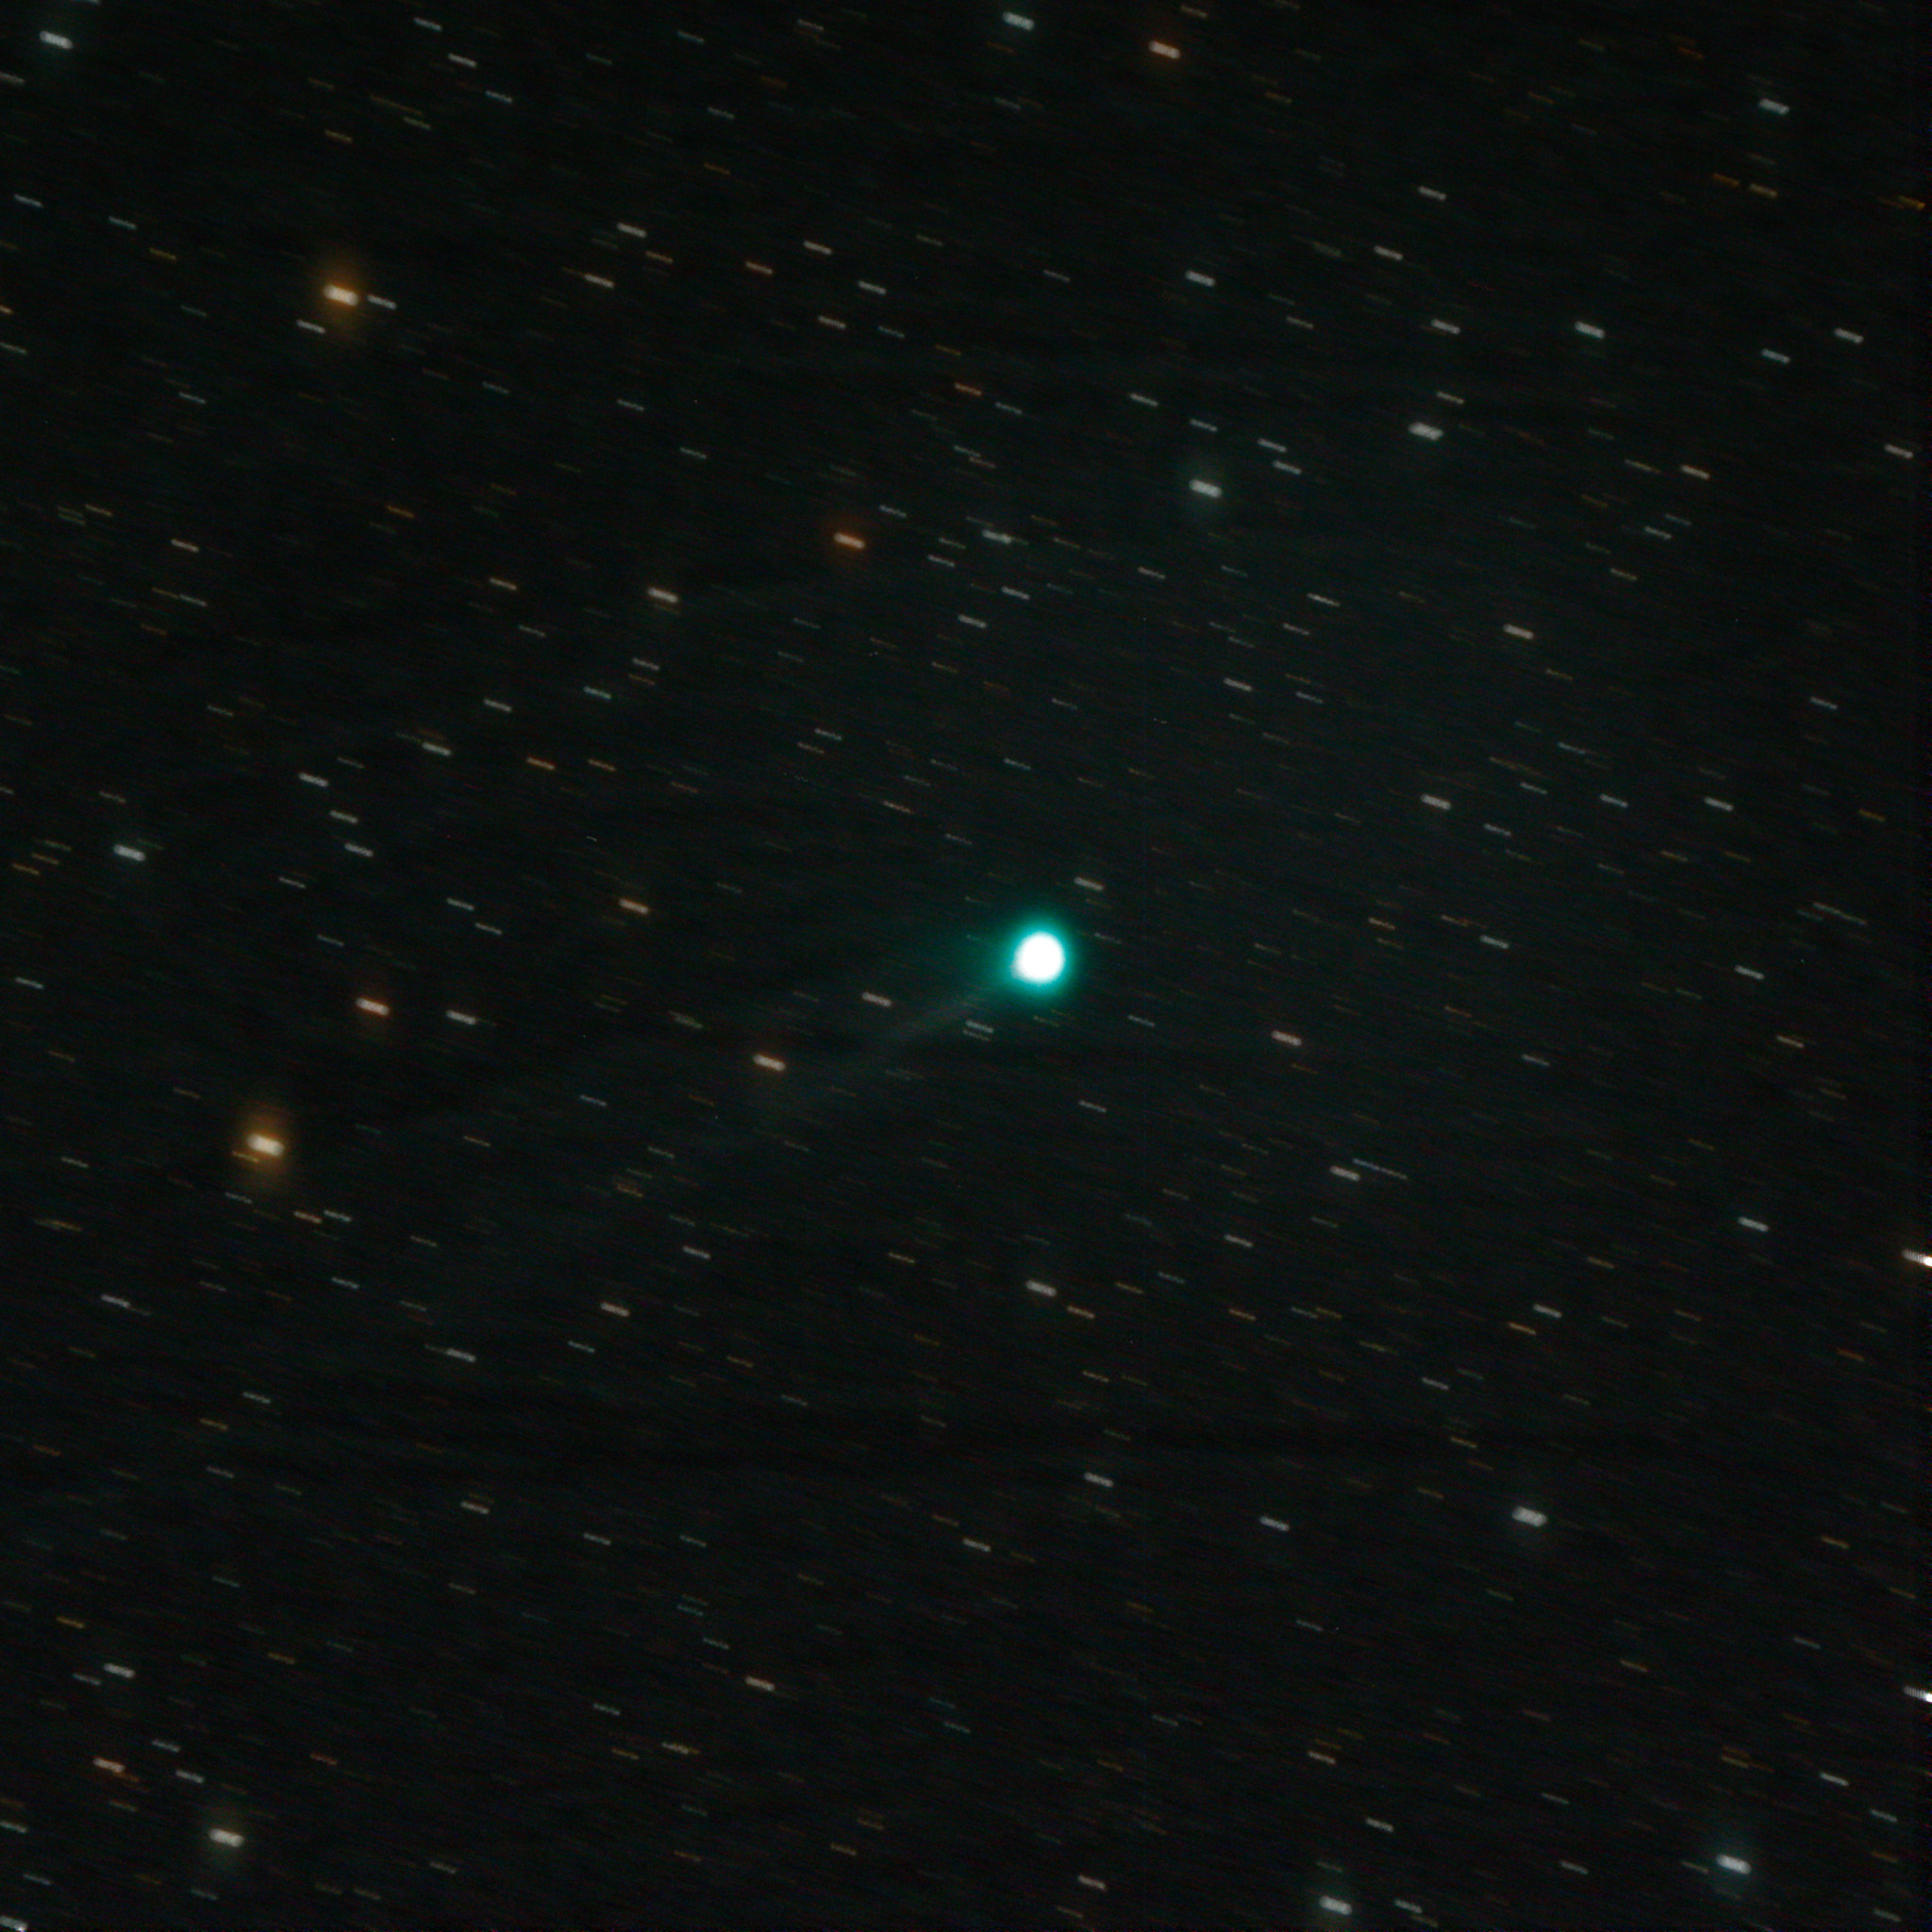
    Comet 2009R1 McNaught
    Comet 2009R1 McNaught, ten one-minute exposures stacked and centered on the comet.

    I also took my ten comet pictures and made a little animation that shows the motion of the comet against the background stars over the course of 15 minutes or so.
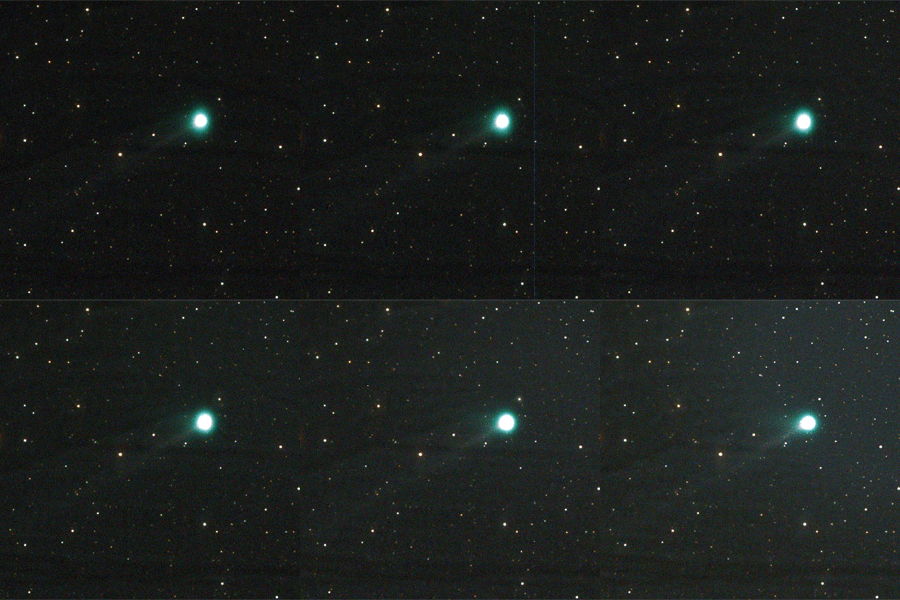
    McNaught animation
    Comet McNaught moves against background stars over fifteen minutes. The sky is also brightening with dawn towards the end.

    I was also taking piggyback images of the sky where McNaught was lurking. Can you find the little green dot near the center?
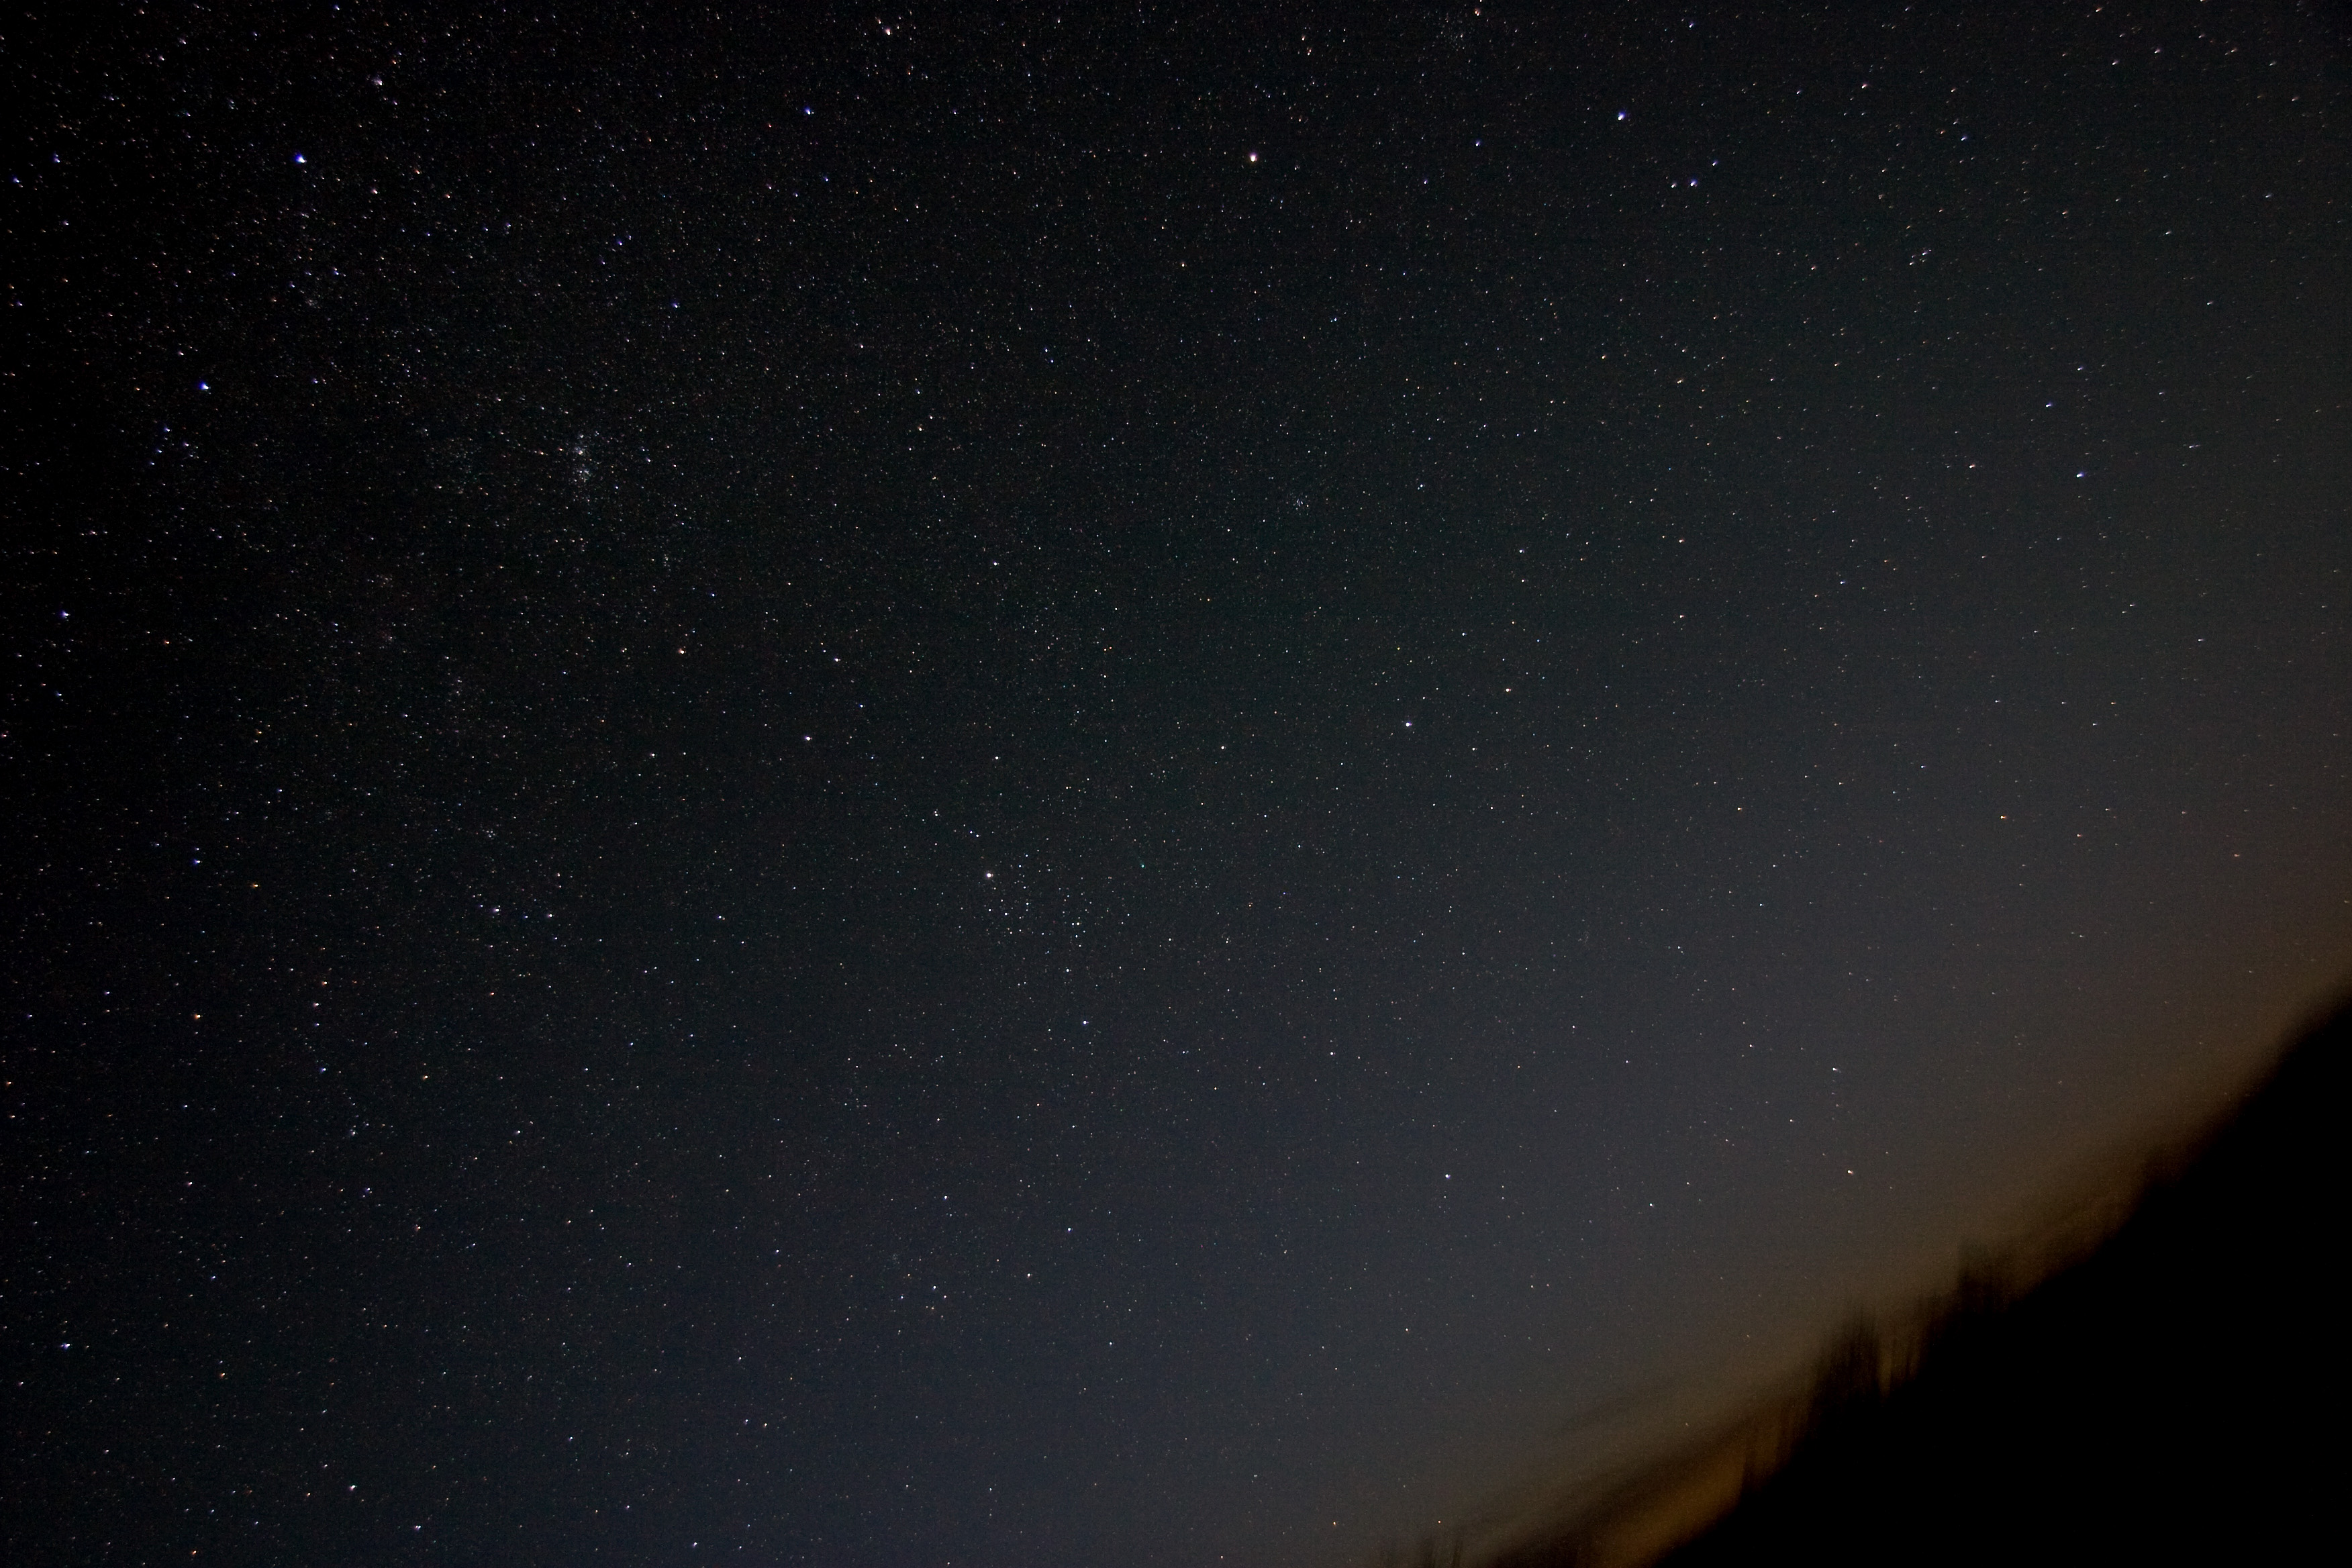
    Perseus and field
    This is the "naked eye" view of the sky where Comet McNaught can be found. The horizon is tilted as an artifact of the way the mount holds the telescope and camera mounted piggyback. Click for the full scale version.

    Here’s a little close up of the beautiful binocular cluster Collinder 39 in Perseus with the green dot of McNaught just to the right. The color was evident in binoculars even.
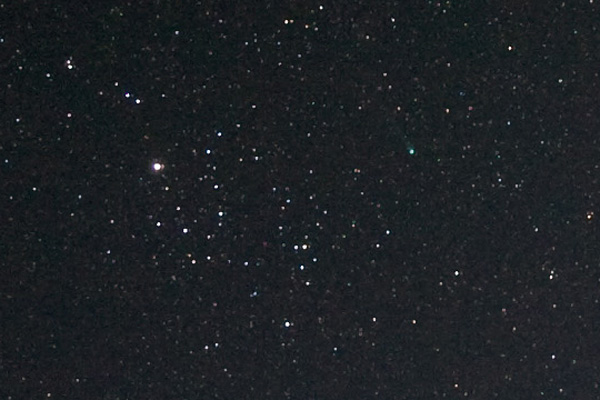
    McNaught with Collinder 39
    This is somewhat the view in a pair of binoculars of large open cluster Collinder 39. See the green dot of comet McNaught slightly up and right of center.

    What a fabulous night of astronomy! Shirt sleeves or light jacket all evening.
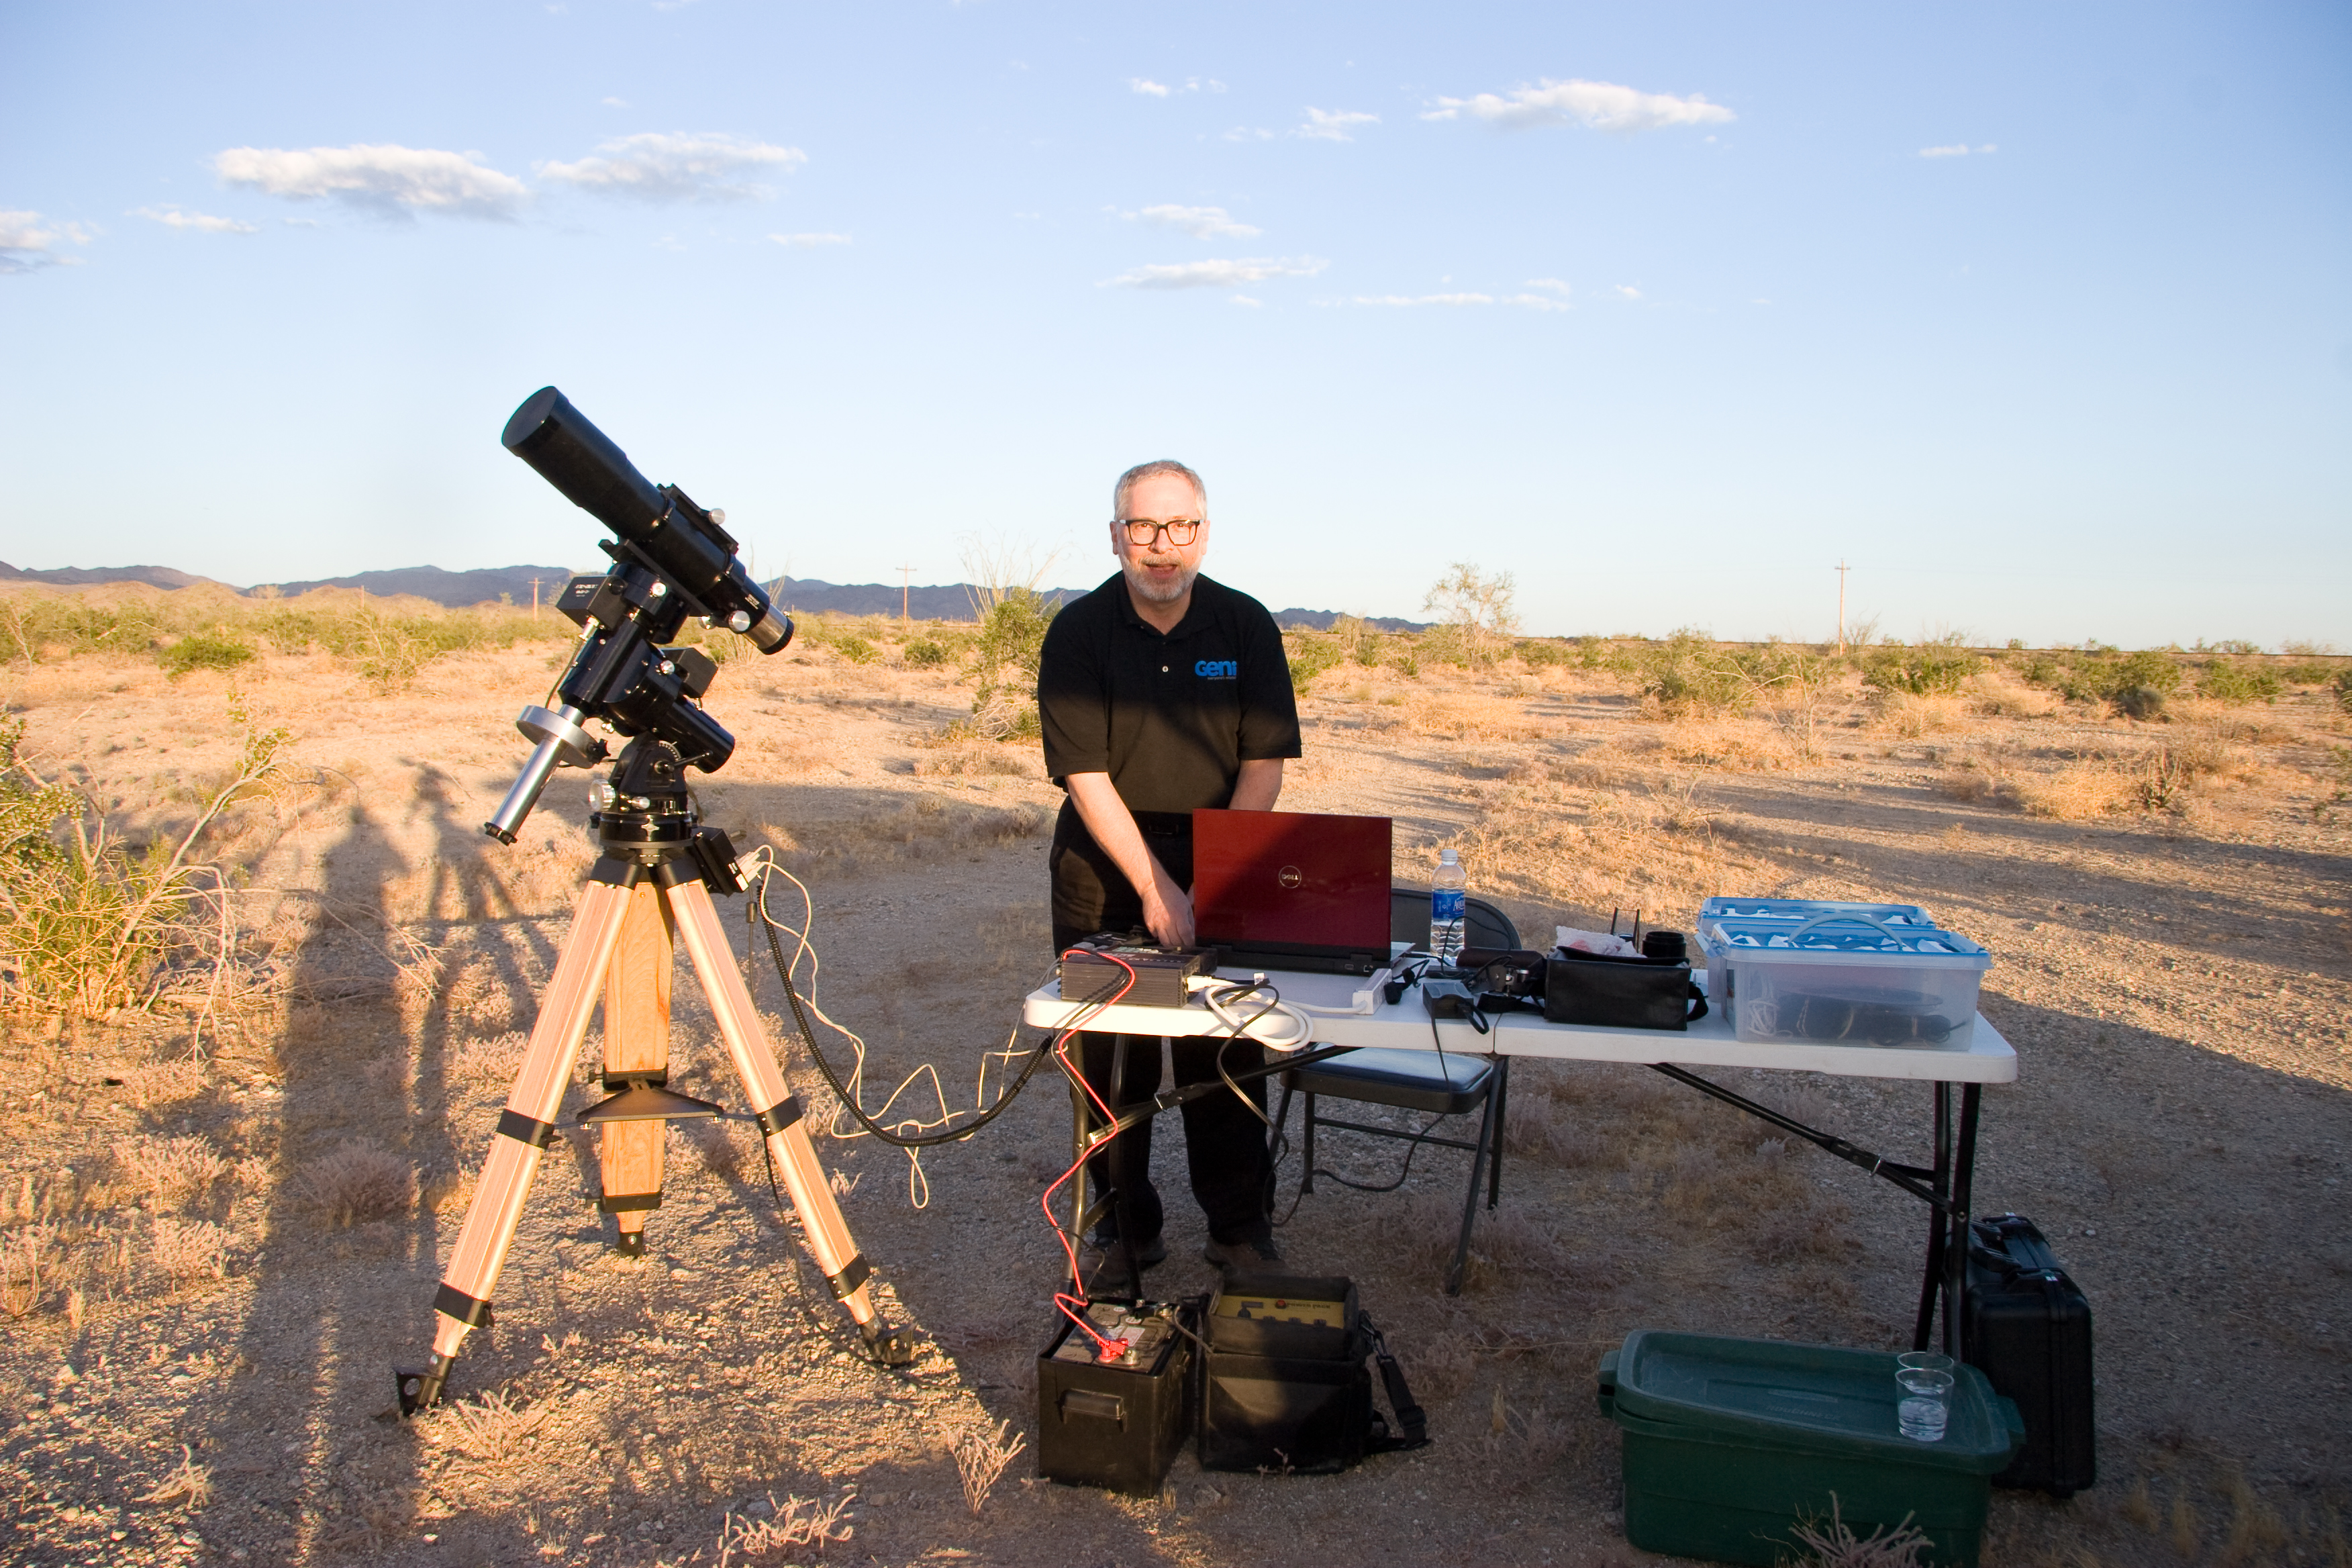
    Mojo setting up for astrophotography
    Mojo setting up his "desert office" for some astrophotography

    Equipment notes: The telescope shots were taken with an SBIG ST-4000XCM one-shot color CCD camera, at prime focus of an Astro-Physics Traveler 105mm f/6 refractor. The mount is an AP Mach 1 GTO on a wooden tripod. The piggyback photos were taken with an unmodified Canon 20D digital SLR camera.

    Update: Be sure to see Jane’s A Ten Planet Night report from the same evening!

  • Pinwheels, Horseheads, and Flaming Stars

    Photo from Feb. 2009 of the Astro-Physics Traveler getting ready for a night of imaging at Chuckwalla Bench
    Photo from Feb. 2009 of the Astro-Physics Traveler getting ready for a night of imaging at Chuckwalla Bench

    Jane and I were by ourselves for the dark sky weekend of November 14, 2009. We set up at our usual spot at Chuckwalla Bench. Unlike the past two months, this night featured a cold air mass that required bundling up well. It also implied that the seeing from our desert location might not be perfect.

    Jane brought her 12.5-inch Litebox dobsonian, and I opted for the 4-inch Traveler refractor (seen in my heading photo).

    The night turned out to be beautiful. The seeing was good, and we were able to enjoy a few early Leonid and Taurid meteors as well. My goal was to try getting more exposure minutes on some classic targets, and try to get some piggyback constellation photos as well.

    M33 and Triangulum region

    Triangulum, Aries, and Andromeda, piggyback naked-eye resolution
    Triangulum, Aries, and Andromeda, piggyback naked-eye resolution

    The famous Pinwheel Galaxy, M33, was a difficult object for me when I started out in astronomy with a classic 8-inch Celestron SCT. The face-on spiral is enormous in the sky, covering almost as much area as the nearby Great Andromeda Galaxy. But its surface brightness is low, so with a little magnification it’s possible to look right through the galaxy without seeing it. I later learned that it sometimes shows up better in binoculars than a telescope.

    If you click on the naked-eye resolution photo nearby, you can find M33 as a faint smudge just to the left of center. M31 the Andromeda Galaxy bright core is in the upper left.

    The three bright stars of Triangulum are in the lower third, just left of center. The bright stars of Aries are also in the lower third, to the right of center. (Might be fun to use Flickr’s photo tagging feature to highlight the features.

    M33 the Pinwheel Galaxy
    M33 the Pinwheel Galaxy

    Again “click to embiggen” as Phil Plait would say. This image is a stack of four 15-minute exposures with the AP Traveler and the SBIG ST-4000XCM one-shot color CCD camera. I love seeing the famous red star-birth regions sprinkled through the arms of this nearby galaxy.

    In terms of technique, I used a Bahtinov focusing mask for the first time. It saved a lot of time in finding and maintaining focus. Autoguiding worked perfectly. It felt really good to have confidence to take long sub-exposures and stack them in Photoshop. This was my first true one-hour image, and the first I’m proud to have seen at full resolution.

    Auriga and IC 405

    Piggyback view of Auriga, naked-eye resolution
    Piggyback view of Auriga, naked-eye resolution

    Auriga was one of the first constellations I identified and recognized on my own as a new astronomer, so I’m always delighted to see it again.

    In the piggyback shot, the bright Auriga stars form a squashed pentagon slightly left of center. The right-most star doubles as part of Taurus. North is to the left, and the brightest star there is Capella. In the full-resolution image you can see the Milky Way open clusters M36, M37, M38, and I think that’s M35 in Gemini in the lower right.

    Jane was enjoying touring through targets in this part of the sky, and spent some time attempting to see visually the difficult target IC 405, the Flaming Star Nebula. (Her companion post on the subject is coming soon.) I was intrigued as well, and took 30-minutes of exposure time on IC 405. It’s not visible in the piggyback view, but is found in Auriga near the upper center of the picture.

    IC 405 the Flaming Star Nebula
    IC 405 the Flaming Star Nebula

    I wasn’t familiar with this target, and the 30-minutes of data here shows only the brightest areas of this faint nebula. Longer exposures and a Hydrogen-alpha filter will show the nebulosity extending out to the left and curling up like a huge comma. This was a really fun target, and I’m looking forward to Jane’s discussion of it.

    Orion, the Flame and the Horseshoe

    Orion, piggyback naked-eye resolution
    Orion, piggyback naked-eye resolution

    Finally I wanted to see if my little 4-inch refractor could possibly do justice to one of the most popular astrophotography targets. Here in my naked-eye resolution piggyback photo is the Orion constellation, with its famous bright star-birth nebula near the dead center of the photo.

    The target I had in mind wasn’t the Orion nebula itself, but two very different nebulae near the left-most belt star Alnitak (Zeta Orionis). Just to the left of Alnitak is a bright yellowish nebula called the Flame. In a telescope it shows a lot of detail, looking almost like tire tracks. The full-resolution picture of the constellation has just a hint of the flame. If you already know it’s there, you might be able to see it.

    For my piggyback photos I used my Canon 20D digital SLR camera, mounted on top of the AP Traveler. I shot 5-minute exposures, and tried to subtract a 5-minute dark frame, which doesn’t seem to make much difference.  The camera does leave behind a reddish glow which I’ve removed in Photoshop.

    Just below Alnitak is the Horsehead nebula, also known as Barnard 33. Seeing the Horsehead visually is a fun and difficult project, requiring really good transparency and a fairly large telescope. Jane observed it visually in her 12.5-inch.

    The Flame and the Horsehead in Orion
    The Flame and the Horsehead in Orion

    I never dreamed the image would turn out this nicely. The big white bright blob just above center is Alnitak. In the lower right is Sigma Orionis, one of my favorite multiple star systems. Of course the bright Flame is just left of Alnitak, and dark nebula B33 is just below center.

    Just as with M33, this image is made up of four 15-minute exposures. The telescope is a 105mm f/6 Astro-Physics Traveler, with an SBIG ST-4000XCM one-shot color CCD camera. The mount is the AP Mach-1 GTO on wooden tripod, and I did autoguiding and image capture with Software Bisque’s CCDSoft. I used SBIG’s CCDOps software to process the Bayer-matrix one-shot color pixels out to luminence and RGB components, combined the L and RGB components in Photoshop, then stacked the four color images for the final photo.

  • Finally autoguiding

    Full photo album of setting up and astrophotos here at the Whiteoaks Photo Album.

    Update: Here’s Jane’s version of the same evening. 🙂

    It was another perfect new moon Saturday for a trip to our favorite spot in the Colorado Desert out I-10.

    Yes this is a very full Grand Caravan!
    Yes this is a very full Grand Caravan!

    Jane and I happily took out all the seats of the old Grand Caravan and filled it with telescopes and gear. We brought her 17.5-inch Litebox dob, and our AP180EDT f/9 refractor.

    Jane has been indulging my dabbling in astrophotography lately. I’ve been delighted that Jane is using some of my astrophotos for the What’s Up podcast, lucky that she wants imperfect images that are closer to what one might actually see in an amateur telescope.

    This 180mm f/9 refractor should be an outstanding astrograph; it’s certainly an amazing visual astronomy instrument. I dabbled with it a little last year in Anza Borrego, knowing I needed to learn a lot of operating technique to get some good results. I solved a few mechanical problems then, and ran into autoguiding calibration later. Those lessons served me well, even though it’s almost a year later.

    Early in the evening was Jupiter time, and we all spent some time soaking up the gorgeous views through a binoviewer in steady seeing. 300x on Jupiter showed lots of detail in the bands, including a nice red barge in the North Equatorial Belt, and nice little disks and color on the moons.

    I’m going to take a few paragraphs to talk shop, gadgets, problems, and solutions.

    Setting up the AP180, all ready to take flats, except theres no known focus position!
    Setting up the AP180, all ready to take flats, except there's no known focus position!

    My camera is an SBIG ST-4000XCM single-shot color CCD camera which perfectly suits my recreational needs. The big AP180 is mounted on an older 900QMD mount, a simple but stable platform without GOTO electronics or servos.

    The 900QMD mount comes with digital encoders on the R.A. and Dec axes, but having spent several years using this telescope for primarily lunar and planetary observing, those encoders went unused for the life of the mount.

    The R.A. axis encoder is removable so you can use a polar alignment scope, and the encoder shaft has a slip fit into a metal sleeve when it’s in place. Last year I discovered that this mechanical connection slips very easily, rendering the encoder useless.

    The trick I settled on, which worked again tonight, was to cut a little piece of rubber band and push it into the fitting to serve as a tightener.

    Jane aligns the Telrad on her 17.5-inch Litebox
    Jane aligns the Telrad on her 17.5-inch Litebox

    To use the digital encoders for pointing, I acquired a BBox from JMI, connected that to a USB-Serial adapter, and used Software Bisque’s TheSky 6 to serve as my controller. I’ve learned by experience (at Fremont Peak observatory) that the alignment doesn’t need to be 100% perfect. I’ve learned the trick of syncing the software and encoders to a bright star near my target, then doing an accurate short slew to my actual target.

    (One problem I haven’t quite solved yet is play in the polar scope. I haven’t figured out how to tighten the polar scope in position, in the correct orientation, so it doesn’t wiggle.)

    So with a not-quite-perfect polar alignment, autoguiding becomes my essential partner. CCDSoft can be tricky software to work with when calibrating the autoguiding. The error messages and manual don’t really help solve problems like “Illegal motion in X-axis, error 352.” I thought I might even be dealing with a problem in the mount mechanics. In retrospect, I think I also hadn’t learned the correct switch settings on the QMD controller. (“Guide” and “.5” works much better than the 16x slew mode for visual!)

    On perusing the Software Bisque support forum last week, I was able to learn that their autoguiding calibration depends entirely on there being only one bright star in a large region of the guide imager. While I could see the guide motions working perfectly and orthogonal, the software doesn’t do matching of the star field, only looking for the one significant guide star.

    Having discovered that, I was finally able to successfully calibrate the autoguider. And with one successful calibration (remembering to set the current declination), I could autoguide on different targets successfully for a long time.

    (The Software Bisque manuals hint that there’s a way to link to TheSky so CCDSoft knows the declination of its target, but I haven’t figured that out yet.)

    M74 two 15-minute exposures, SBIG ST-4000XCM, 180mm f/9, October 17, 2009
    M74 two 15-minute exposures, SBIG ST-4000XCM, 180mm f/9, October 17, 2009

    Pisces was high overhead, and I love M74, so I decided as a first target to revisit that favorite. I settled on 15-minute exposures. The first one came out “double vision” when the autoguider momentarily lost track during the exposure, but that was the only time that happened during the evening.

    NGC7541 in Pisces, 15 minutes
    NGC7541 in Pisces, 15 minutes

    A visit to the Night Sky Observers Guide suggested NGC7541 as a Pisces “showpiece,” and I love galaxy groups. This one was gorgeous in Jane’s 17.5-inch, too.

    NGC7640, 15-minute exposure
    NGC7640, 15-minute exposure

    Jane showed me NGC7640 in her 17-inch, a really lovely look, and I thought it would be a great target. We’re starting to enjoy comparing visual and imaging views.

    NGC253, 2x15minute exposures
    NGC253, 2x15minute exposures

    I admit I get impatient when I’m imaging, and want to collect more targets rather than more exposures on the same target. As a result, I have a little more noise in my images, but I’m having fun anyway. That said, I couldn’t resist spending some time on NGC253, the Silver Coin galaxy. I had a tantalizing glimpse of this target last year at Anza Borrego when I hadn’t yet learned how to make the autoguiding work. This time I got two lovely 15-minute exposures. Well worth it.

    Pre-dawn crepuscular rays at Chuckwalla Bench
    Pre-dawn crepuscular rays at Chuckwalla Bench

    After a few hours sleep, we were greeted with lovely pre-dawn crepuscular rays, Venus, and Saturn making its return after solar conjunction. Not to worry, the telescope was capped, and about to come down into its box, anyway. (You can see the box ready to be loaded with telescope.) Jane paused to take this lovely picture.

  • Perfect wallpaper from digital photos using Linux and Netpbm

    The world is full of wallpaper managers for every operating system out there. I enjoy wallpapers taken from some of my digital photography, such as this trip to Yosemite last year.

    On nice modern monitors, you can really enjoy the full resolution of your pictures. Jane and I just replaced our old Viewsonic CRT monitors with some nice Dell 23-inch LCD models.

    Immediately I saw that I needed to regenerate our collection of wallpaper photos to match the aspect ratio and higher resolution of our new monitors. I admit to being a stickler for my wallpaper photo albums. I have these requirements:

    • I want to scale and crop the photos to fill the screen exactly, no tiling or stretching.
    • I want no black bars, letterboxing, or distorted aspect ratios
    • I want to dim the maximum brightness of the photos so my desktop icons are still discernable

    My Canon 20D full-resolution pictures have more than enough pixels to fill the biggest screen, so I cobbled together a shell script some time ago using the PBM (Portable Bitmap) tools that have been around since probably the 80’s for manipulating images. I don’t think many of the Linux distros install the toolset by default, but they’re easily available. On Ubuntu or Debian you can install them with “apt-get install netpbm”.

    I start by making a work directory (“wallpaper” in this instance) and a subdirectory to hold the full-resolution original images, named “full”. I collect copies of my full-resolution pictures there in ~/wallpaper/full.

    Next I need to work out the transform. My original resolution images are 3504 pixels wide by 2336 pixels vertically. My monitor is 2048 pixels by 1152 pixels.

    Rather than work out the math, I just scaled an original picture to the monitor width to see how tall it would be. This command pipeline would scale a picture to 2048 pixels wide:

    jpegtopnm full/IMG_1234.jpg | pnmscale -width 2048 | pnmtojpeg >IMG_1234.jpg

    Opening that scaled image in Gimp told me that it was 2048 x 1365. That tells me that I need to crop some lines from the top and bottom of the image to fit them exactly to my monitor field. 1365 – 1152 leaves 213 lines to cut from the image. With the pbmtool “pamcut” I plan to cut 107 lines from the top of the image and give it a total height of 1152.

    So I made this shell script to process all of the photos. The plan is to read all of the files from the “full” directory, and write perfectly scaled images to a subdirectory named “2048”. I’m also going to use the “ppmdim” utility to reduce the overall brightness of the images just a little. Here is the final script, called “mkwall2048”:

    for i in `ls -1 full`
    do
    echo $i
    jpegtopnm full/$i \
     | pnmscale -width 2048 \
     | pamcut -top=107 -height=1152 \
     | ppmdim 0.8 \
     | pnmtojpeg >2048/$i
    done

    This loops through every file in the “full” directory, putting the filename in variable $i. The rest of the script is a pipeline that feeds the image through five different tools from the Portable Bitmap collection, as follows:

    1. jpegtopnm converts the input file to a portable “any” map, then feeds it to stdout
    2. pnmscale scales the image to a width of 2048 pixels, preserving the aspect ratio
    3. pamcut slices off the top 107 lines, and preserves the next 1152 lines of the image
    4. ppmdim reduces the brightness of the image by 20% (80% of the existing brightness)
    5. pnmtojpeg converts the portable bitmap image back to a JPEG file

    I’ve adjusted this script using the same process to make perfect wallpapers for my laptop monitors and desktops at work. It’s a real treat having a slideshow of my favorite photography available behind my work.

  • Making panoramas

    Moonstone Beach in Cambria, CA
    Moonstone Beach in Cambria, CA

    I love to make panoramas almost anywhere I take the camera. There are some examples on last week’s Mojave National Preserve trip, a weekend at Moonstone Beach, and the Fremont Peak Star-B-Q.

    Making them smoothly takes a little practice, so I thought I’d pass on my pointers. I use a Canon 20D and Panorama Factory.

    Panorama Factory is so good at stitching together the pictures, you really don’t need to make any special effort at leveling the camera. No tripod is required, just turn and shoot. But a little preparation pays off later.

    Once I’ve found a spot to take a panorama, I mark the beginning by taking a black frame: Turn off auto-focus, put the camera in manual exposure mode, then cup my hand over the lens to make a black frame.

    The pano pictures will blend best if they all have the same exposure. I’ll use the built-in light meter while panning around the scene, and try to pick a median setting that doesn’t go more than one stop or so toward over or under exposing. In a lot of scenes with a brightly lit portion, this might be a challenge.

    I try to avoid using the widest-angle setting of my lens to avoid any vignetting, and like to choose a “50mm equivalent” focal length, which is 35mm on my Canon 20D. You might also turn off auto-focus to keep the camera from suddenly focusing close if you sweep across a foreground object.

    You don’t always have a horizon line, but it’s a handy reference if you do. My Canon 20D has auto focus targets in the viewfinder that serve as a nice leveling tool. Work from left to right and give each shot a little overlap. That’s about all the care you need to take.

    I’ll end the series with another black frame. Don’t forget to put your camera back into auto-focus and your preferred exposure mode. A low ASA setting will help keep the noise low.

    I shoot all my pictures in RAW mode, so they have to be processed into JPEGs. I use Adobe Lightroom for that. Generally if the exposure and white balance look good, the pictures shouldn’t need any adjustment. If some adjustment is needed, the panorama will come out best if you can apply the same adjustment to all of the photos. Lightroom’s copy and paste settings feature is useful for this.

    Once you have your collection of individual shots, you can start through Panorama Factory’s wizard to begin stitching them. Since you shot from left to right, the filename order will be correct when you import them to Panorama Factory.

    (I’m still using V4 of Panorama Factory, so some of these settings might have changed, but I’m sure the basics are still valid.)

    Remember you can import all of the pictures with one step, by doing a multiple-select in the file browser. (I always make an individual work directory for the pano pictures.)

    After the import, select “Fully automatic” photo stitching, set the camera type, and yes to “Automatically detect focal length.” DO select “Correct barrel distortion,” and DO NOT select “Correct brightness falloff.”

    Yes, do select “Automatically fine tune.” But do NOT take the recommendation to allow Panorama Factory to do exposure matching or exposure correction. You took care of exposure matching at the time you took the shots by selecting one manual exposure for all of the pictures. And, at least in V4 of Panorama Factory, I’ve found that it tends to posterize the image when it does any exposure adjustment.

    Say “yes” to sharpen the final image. I use a setting of 50%, but feel free to experiment.

    For an output format, I select “Image file only,” and set either “Partial” or “360 degree” panorama as appropriate for the series.

    Here’s one note, if you select 360 degree panorama, and you have a full overlapping frame on each end, Panorama Factory sometimes does not find the 360 degree point and duplicates part of the image. Deleting one shot from the pano on either end will solve the problem.

    I typically use the “Spherical projection.” Not sure why. 🙂

    I have other tools for printing, so all I want out of Panorama Factory is the image. I’ll select “Prepare image for internet display” and “Maximum size.”

    Now when you click “Next,” Panorama Factory will work its magic for a few minutes. Save the image at the end. When it’s all done, I’ll use Photoshop or VuePrint to make thumbnail versions for my photo album, usually 800 pixels wide.

    Admittedly I need to try this with V5 of Panorama Factory, but I bet the process will be close.

    Once you develop a rhythm for making panos, you’ll enjoy making more of them.  I always take the laptop along on a road trip, and frequently I’ll make the panoramas right there in the car while Jane drives.

    I’ll try to make another post on how I mix them into a JAlbum photo album.

  • Snakes, Tortoises, and Stars

    Photos and video found here

    What do herpetologists and astronomers have in common?

    They both like going out on new moon weekends: astronomers to find faint fuzzies, and herpetologists to find nocturnal reptiles.

    Last year in October, Jane met herpetologist Hanna Strauss at an event in Mojave National Preserve, and the two of them resolved to get together again on a new moon weekend. We did that this past weekend, the new moon weekend of April 2009.

    Windy Friday Night

    Telescope Pad and our tent set up Friday evening at Black Canyon Group Camp.
    "Telescope Pad" and our tent set up Friday evening at Black Canyon Group Camp.

    Jane and I departed Monrovia on Friday, April 24, just before noon, and were the first to arrive at Black Canyon Group Camp at about 4:00 p.m. The astronomy forecast for Friday was pretty bad; there was a persistent thin layer of clouds that made the sky a little more like Los Angeles sky than desert. We were able to coax out some fair views of Saturn and some of the bright double stars.

    Jane went out “herping” with Hanna and came back to report finding several varieties of snakes on Black Canyon Rd.

    The worst part of the evening was the wind. We knew it was coming; it was all over the forecasts. I was first to climb into my tent with the wind not being too bad, but around midnight, it really turned into a gale. Jane and I were warm and comfortable in our sleeping bag, and the tent was firmly staked down, but there was little sleep to be had that night!

    We could hear the gusts approaching, echoing off the smooth canyon walls, sounding a little like an approaching jet. It went on ’til almost sunrise. The tent managed to hold up, but our old tent already had a front door zipper that would not close well, and our front door was soon hanging by a couple of zipper pulls. Fortunately the door was facing away from the wind.

    The stakes held all night. I kept half-expecting the tent to rip apart, but it held. The wind would blow it almost horizontal onto our heads. A few equipment boxes lost their lids. Amazingly everything was recovered, and nothing seriously damaged — though we heard the next morning that our telescopes were blowing around like weather vanes.

    Saturday Exploring

    Aligning finders using yucca plants on the distant mountain ridge.
    Aligning finders using yucca plants on the distant mountain ridge.

    Big groups are difficult to keep to an early schedule, and the lizards won’t wait. We got everyone together for a walk across the road to Hole-in-the-Wall. We found several small lizards, and had fun crawling over the interesting formations. Several of the group took off to explore Mitchell Caverns, and Jane and I joined another group to drive through the park.

    We stopped along the way at a dense joshua tree forest, at the Kelso Depot, and walked the Kelso Dunes trail. After visiting Baker for ice cream and gas, we drove back on paved roads (94 miles) to the group campsite.

    This evening was looking a lot better for astronomy. The sky was crystal clear. The seeing forecast was poor, but the actual seeing was good enough to see dust lanes in galaxies.

    Everyone enjoyed seeing Saturn, of course. I really enjoyed seeing a strong zodiacal light in the dark transparent sky. The site is very dark, with a fairly strong light dome to the north from Primm. It’s galaxy season, and I enjoyed showing the big Ursa Major galaxies M81 and M82, the bright Leo pair M65 and M66, beautiful edge-on NGC4565, face-on spiral M51 the Whirlpool, M104 the Sombrero, and the Virgo galaxies near M64 and M66.

    What About Tortoises?

    Turtle three has been chowing down, or likes green lipstick.
    Tortoise three has been chowing down, or likes green lipstick.

    On Saturday evening, I didn’t go out herping. The group that did came back saying they’d been skunked.

    “What, you found skunks?” I asked. No, they hadn’t found anything!

    So we’d spent the whole weekend without seeing any of the desert tortoises Mojave National Preserve is famous for. It hardly mattered, as we’d had an adventurous and interesting weekend with great company.

    On Sunday morning we were among the last to be packed and ready to go along with Gary and his daughter Catherine. Jane was driving, and we were heading out of the park down Black Canyon Rd. We both saw a tortoise naively sitting in the oncoming lane about four miles from Hole-in-the-Wall. Jane quickly stopped, as did Gary behind us.

    We debated what to do with a tortoise not wanting to move, sitting right in the middle of a traffic lane. We vowed to see him safely off the road, and fortunately there was no traffic. Eventually Jane was able to help him off the road, and we left him in safety.

    Two more times we stopped for tortoises on Black Canyon. These two were up and walking around, and out of harm’s way at least for the moment. Everyone got pictures, and Jane took some great video.

    Once more we stopped for a tortoise shell on Essex Rd. before leaving the park. This one turned out to be a decoy, with a flier attached advising motorists to keep an eye out for tortoises on the road, and drive carefully and slowly through the park.

    Photo and Video Album

    Jane and I both shot a lot of pictures over the weekend. It’s not art-house photography by any means, but there are a lot of fun pictures. I enjoyed making a couple of panoramas: one of the group camp before anyone else arrived, and one of the Kelso Dunes from the dunes trail. With the laptop in the car, I was able to make panoramas and start the photo album. I uploaded a first draft from a Starbucks in Barstow.

    On Sunday Jane shot some short videos of our three tortoises. The first tortoise wasn’t terribly interesting, just sitting in the middle of a traffic lane. The other two, included in the album, are quite animated and fun to watch.

    One short epilogue about our Friday night gale. Our valiant tent kept us protected; it bent but never broke. It did have a funny shape on Saturday morning. When I took it down on Sunday, a couple of the metal sleeves that hold the support rods of the tent had deformed. It’s time for a new tent.

  • Making Flash video from AVI files for JAlbum

    My wife’s little point-and-shoot Canon SD870 makes some splendid video. The full-res versions are motion-JPEG files stored as an AVI. It doesn’t take very long to eat up a lot of megabytes.

    It’s not very practical to share our video on a web site in its raw form. By converting the AVI video to Flash, you can take advantage of modern video compression to make serving the video to friends and family practical and convenient.

    (Of course you can always upload the raw file to YouTube and let them do the conversion, but I like owning my content and serving it from my own site. Why prop up Google’s coffers with your content?)

    My favorite photo album creator JAlbum will let you drop a Flash video file into a photo album folder. It will do all the set-up with the flash player.

    So the first step is to convert your massive raw video into Flash. I use the free open-source command line tool ffmpeg.

    FFmpeg is mostly provided with Linux distributions (if you run Linux you may already have it on your machine). If you want to use it on Windows, you have to put in a little extra effort.

    This site http://ffmpeg.arrozcru.org/builds/ has ffmpeg builds for windows. Download the latest from the top of their page, ffmpeg-latest.tar.bz2. To unpack it, you’ll need a gnu tar implementation as well, which is available here: http://gnuwin32.sourceforge.net/packages/gtar.htm. (In a future post I’ll provide some suggestions for keeping command line tools and your execution path organized.)

    Once you’ve extracted ffmpeg.exe and placed it somewhere on your path, you’ll be able to convert the AVI files to Flash (H.264) video, but the options and documentation for ffmpeg are pretty daunting. It is truly a swiss army knife of media conversion tools.

    I spent some time researching recommended encoding parameters intended for typical medium-speed broadband downloads. This article from Adobe had some very good guidelines for selecting encoding parameters for typical web video.

    Armed with this information, I am able to generate Flash video .flv files from Canon’s AVI video files. FFmpeg is also useful to extract a still frame from the video to be used as a thumbnail image for JAlbum.

    Here is my command line to convert the Canon AVI videos to Flash video suitable for posting:

    \path\to\ffmpeg.exe -i %1.AVI -ar 44100 -s 320x240 -r 29.97 -b 575000 -keyint_min 60 -y %1.flv

    That’s what I use in a batch file to transcode an AVI file. The %1 is the base filename of the video without the .AVI extension. This sets an audio bitrate of 44,100 bps, a video size of 320×240 (QVGA), a frame rate of 29.97, and a video bitrate of 575 kbps. The “keyframe interval” is the one recommended by the Adobe site above.

    The next line of my batch file extracts a frame from the video to use as a thumbnail, and saves it as a JPEG image:

    \path\to\ffmpeg.exe -i %1.flv -an -ss 00:00:03 -vframes 1 -y -f image2 %1.jpg

    This grabs a frame from three seconds into the video.  If you want a “middle” frame, you’ll have to do the computation on the run time of the video.

    (Obviously you need to replace the \path\to part to the actual path to your copy of ffmpeg.exe.)

    Those two lines in a batch file are a good start.  I’ll run the batch as, for example:

    mkflv.bat MVI_8243

    That will leave behind MVI_8243.AVI, MVI_8243.flv, and MVI_8243.jpg.

    We’re almost done. When you drag the Flash file into a JAlbum folder, JAlbum will look back in the original directory for a thumbnail image. The thumbnail should be a JPEG file, but it needs to have the file extension of .THM instead of .jpg. So my batch file includes the following two lines as well:

    del %1.THM
    rename %1.jpg %1.THM

    That deletes an existing thumbnail (which is generated by the camera in my case) and replaces it with the ffmpeg extracted frame.

    I use the Chameleon skin for JAlbum, and Flash video support might be highly dependent on your skin.

    So my family all converged on Atlanta, GA, this past Easter weekend to spend some time together, and naturally it was a great occasion to take a lot of pictures. Jane used her Canon to shoot some fascinating video of a major hail storm that passed through on Friday evening.

    I used this technique to transcode the video into Flash, and posted them in the fourth folder of the album. See for yourself how it turned out.